Showing posts with label Throwback Thursday. Show all posts

Thursday, June 14, 2018

TBTH: January 29, 2015

Here's my Throwback Thursday Post.

Go take a look at it if you want more info on how it was done and some close up shots.

This is the finished result:


What I found so fascinating about this page is that I made the background with ink pads. I used Colorbox ink pads in the three primary colors to create the rainbow. Because the Colorbox pads are pigment ink and the pads are foam and squishy, they can easily go through a stencil without any other applicator.

I always try to make sure I have a set of primary colors in the media that I like. If I'm trying out a new media, I'll get red, yellow, and blue with which to experiment. If those colors work out, I may expand into other colors that aren't easy to mix. This is why orange is always last on my list of colors to add to my "collections". Orange is a color that is easily mixed...so is purple really. It's green that I can never really match. If I don't mix enough of a green, then I'm hard pressed to get the same shade again. But orange and purple aren't so tough. Hmphf...go figure.

Anyway, hope you enjoyed the time machine today. You don't have to wait for a Throwback Thursday, you can explore the blog and all it's past posts. Or search by the label, there are some suggestions on the right.

-Wy

Thursday, October 26, 2017

Throwback Thursday: Ghosts of the Past


Ok, so today's post is a bit of a cop out, I admit it.
This is not a completely new blog post with a new project.

However, I have gone back through the archives of Sometimes Wy to dig up some useful Halloween inspiration that you might have forgotten or overlooked.

These are a few ghosts of the past come back to haunt this years Halloween marathon.
This may be the beginning of a new life for the Throwback Thursday post...like a corpse rising from the grave.

So here's the first throwback.
Remember this:
It was posted October 14, 2012 under the blog post title, "Wanted: A Little Courage". Strange about going back and reading these old posts. Some of the things I've written then are the same today. Check out the full post, if you're interested in the memories. Just scroll down to the photos, if you're interested in seeing how I put this tag together. In case you were wondering, yes, I still have this tag.


So here's another project near and dear to my heart.

This was posted on October 23, 2013 under the title, "Poe's Nevermore". It's the cover of a composition notebook that I altered. (and subsequently sold at a craft show) Check out the old blog post to see some of the old supplies I used and to see the back cover and more detailed photos, if you so desire. This was really the inspiration for my Poe Canvas series.

How about this one?
This blog post is from January 27, 2016, not too long ago. It is titled quite simply, Chibitronics: Paper Lanterns.


This blog post fits in here because I always thought I'd make these at Halloween time. The Chibitronics LEDs and copper tape allow the lanterns to be battery powered. Thus, they can be hung anywhere! Though, the post shows blue lanterns, these paper lanterns come in many colors and I currently have green ones in my hoard that would be good for Halloween or for an Alien Invasion party.
I admit that the post is lengthy and may seem intimidating but honestly, the circuit I devised is wickedly easy to make. The crux of the complexity comes in the removal of the inner core frame of the lantern itself.
(I'm also making note of the post as I will need it to complete the green ones. This recent link will make it easier to find later for me!)

So that's Throwback Thursday for the Halloween Marathon. Thanks for stopping in!
New Halloween post on Sunday and then hopefully, on Tuesday...Halloween Day!
Thanks for joining me throughout the month.
-Wy

Thursday, January 12, 2017

Welcome 2017

I went back to my Welcome 2016 post to see what goals I made last year that I may have accomplished or not. If you're interested in the whole post, click that link...the goals are down toward the bottom, if you're the scrolling type. (Hey, no judgement, I like that scrolling action, too.)

In this post, I'm going to do the same type of thing. I'm going to set my goals for this year and reflect on anything I might have learned this past year. I know some of it is the same as last year! But this year, I'm ahead of the game and thinking about this stuff a month earlier. I wonder if that will mean I'll get more stuff accomplished!

Goals accomplished in 2016:
1. Inspiration Wednesday Journal Completed! It was completed in good time and before the start of the next year. All those posts are labeled with Inspiration Wednesday so if you click that label over at the right, they'll all come up. Overall, I had a good time with it. But as with all art journals I have completed so far, I never like it all. I've got some ugly mixed in there and it will stay there. Just as I've got some great stuff in there and it will stay there. That is how I approach art journaling: keep it all because it's a snapshot of a moment in time.

2. Art Journal Adventure Completed!  This was just completed early this year with the same caveat as above...a bit of good, meh, and ugly. But I can honestly say my favorite page is in this journal. I'm hoping for more of THAT this year.

3. Color Palette Journal still underway. I have not worked in this journal in quite some time. I have several ideas for palettes laid out but have not done them. I think I got wrapped up in keeping up with the two above journals that I couldn't find time to work in this one. It may also be that this one was going to be fundamentally different in technique as I decided to use less paints and more "scrapbook" type things. I'm calling this one a FAIL as the goal of starting this journal was to look at that Pinterest board and utilize it for inspiration. That really didn't happen.

4. Designing Calender Pages is progressing.  I do have some of these pages done but I don't share them here. Perhaps when I get them done and I'm happy with them. I am making some but my focus for them has shifted over the year. I started thinking they'd be very representative of the "season" or "holiday". But I changed my mind and starting doing pages that just feel like that month in color or shape. I haven't decided whether the ones I already had finished will make the cut. So a FAIL in that I didn't get it done but it is a work in progress and I'm ok with that.

5. Design a Divination Deck.  Did you read #4? Ditto here. My major challenge here is that I'm changing my mind a lot. I like to have things "themed" rather than just a random assortment of artwork. This may be my stumbling block. So yea, it's a small FAIL.

6. Make more altered books...um, big FAIL. Didn't make a one in 2016. Ugh.

I also accomplished:
1. A couple winter/Christmas canvas'.

2. A load of Halloween projects to keep this blog very active for the month of October. (Despite the loss of my cat-friend, Aussie, in that month, too.) I was quite proud of another Poe canvas called, "Black Cat", which pairs quite well with "Raven" from 2015. Even my mom, who isn't much into Halloween, liked that canvas and allowed me to display it all month in our living room.

What I learned in 2016:

1. Distress inks and it's color palette are my favorite. I dissed the Distress markers last year and vowed to use them up and not replace them. I may be changing my mind. After having purchased and used the Zig Clean Color Real Brush markers, I was still going back to the Distress Markers for the colors. The Zig I had purchased were bright and bold and I found myself wanting the paler, grungier colors of the Distress palette. Whether I will replace the Distress markers as they "go up", I'm not sure. It's the color palette I like and I can color with the ink pads as well as a marker.

2. I learned a lot about color this year. Not just that I think of colors in terms of the Distress palette but how certain colors layer over each other and mix together. I am feeling quite confident in my color instincts. I have also become obsessed with making swatches of all of my colorants. (How bad is it? I even swatched out a box of crayola crayons. No kidding.)

3. I get great enjoyment from Halloween projects. The 3-D pieces that I completed this year were along this theme and I had a fantastic time making them. I LOVED it.

4. The most important thing I learned this year was that creativity comes from action. The less time I had to play around in my basement with art journaling, the less ideas I had for any projects I wanted to complete. When I had a rare two days in a row to create, I found that on the second day, my energy levels were up and I got a lot accomplished. I needed to start something, anything, just to get my juices flowing. Each subsequent project was more satisfying and seemed "better" to me. Creativity comes from motion, from play, and from giving yourself the time to let that happen.

Goals for 2017:

1. Work more in the Color Palette Journal. What the heck, maybe this year!

2. Make altered books!  What the heck, maybe this year!

3. Make Halloween projects whenever I want!  Why stick to October? I'm going to start earlier this year. I think I started a month ahead last year. I may just do them whenever I want and save them for October.

4. Finish Calender and Divination Cards pages.  Hopefully, I'll have a finished project for both this year. These may help with the next goal, too.

5. Get the Etsy shop back up and running. I had a shop a while ago but let it fall away. Now that I cam taking photos of just about everything I create, I might as well post them for sale. I have a horrible time selling anything at craft fairs as I don't have the time or the support. For me, it's hard to set up a table in an outdoor venue as I have no help to put up a tent. So the Etsy shop may be a way to sell some cards and canvas' to support my art habit. This also means I will be investing in a "business" which brings the decision as to whether to "brand" myself differently. My challenge here will be to just make a decision and stick with it.


Well, I wonder if any of these things will get done this year. I'm hopeful. I should be working a bit less so I'll have some time to devote to these goals.
-Wy

Wednesday, October 26, 2016

Throwback Thursday: Sept 15, 2013

TBT is a day early so I can join in on some Challenges! You can see the original post HERE.

This year I was inspired by my golden pumpkin portrait aptly named, "Patchwork Jack". I was inspired not only by this canvas, but by two challenges.

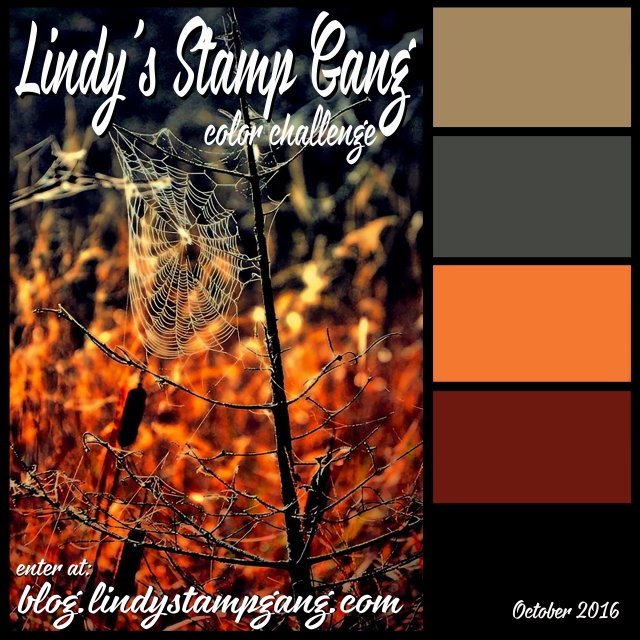
My color palette was inspired by Lindy's Stamp Gang Challenge for October. You can find the details at their BLOG.
The products I used were: Hag's Wart Orange Magical (from this Halloween set);
Red Hot Poker Orange Starburst Spray; Fuzzy Navel Peach Starburst Spray; A Bit O'Bubbly Starburst Spray; and 3 embossing powders: Byzantine Bronze; Queen Sheba's Silver; Midnight Violet.  

I was inspired in composition by the October challenge at Creative Embellishments, HERE. They had this lovely inspiration:
pumpkin
 I used their chipboard gears in various sizes. (Here's a few of them.) I also used these jack o'lanterns.
 There was a twist to their challenge to add a touch of metal.
(If you like to create things...any things...check out these monthly challenges. You get an opportunity to win some quality products from their shops!)
 
So here is what I created:
Steampunkin':  This has been a vision in my head for a couple Halloweens now. This was the year to make it. It's a 12 X 12 canvas. I collaged a background of patch-worked papers in black and white. I used a large piece of watercolor paper as a "mother board" for all the orange. I used the Lindy's magical and Starburst sprays to get the color. I tore out my pumpkin and stamped the light bulbs. (Stamp image from Joggles.com)
Next comes the fun.
All those gears along the edge were embossed with a variety of the Lindy's powders. I used them in combination with each other and added in some copper (from Ranger) for the small pumpkins. I love that the Midnight Violet powder looks black but gives a purple hue in just the right light. That gold shimmer from the Starburst sprays added some great "glow" to both the lights and the pumpkin.
All the gears were embossed chipboard so I added my metal "twist" on the face. I used 2 metal bottlecaps as the base for my eyes and various keys for the mouth. All the pieces are attached with Multi Medium (Ranger). I also threw in some buttons, rhinestones, and little orange roses to fill in some gaps and add a touch more color.

Thanks for dropping by!
-Wy
"Amuck, amuck, amuck, amuck..."  --Hocus Pocus

Thursday, October 13, 2016

Throwback Thursday: Haunted House

A few years ago I made a Haunted House from a cardboard form that I bought at Oriental Trading Company. Seriously. Oriental Trading Company.

The form was bigger than I anticipated when it arrived and I had a surplus of Halloween scrapbooking supplies on hand. That's mainly what I used to decorate it. Overall, I liked it. Except that I didn't have a strong enough tape to hold the sides and roof on it. So after a year, it began to buckle.

This was back before I was blogging regularly so I never took photos of it. But I pulled it out of it's dusty storage cupboard and decided to fix 'er up! I figured since it was falling apart at it's seams, I might as well add a few more inside details that I had wished I had added years ago.


 So here she is: under construction. So I'm going to add some interior decor to the side walls and glue her up again. It is very different from the mixed media style I'm using currently but I still love it. The patterned papers are some of my favorites and it's a Haunted House! How can that be bad!?

So here are the renovations:


I added the two other walls. Just little bits to give the interior a finished look. That's because you CAN see the interior.
Originally, I cut the front windows and the door so they would open. So you can peer inside the little house through either or all of them.

There's the front and back of the house, too.
Like I said, it isn't any grand project but I like it. It's good enough for me!
-Wy
"That's right. I am the Pumpkin King! And I just can't wait until next Halloween!" --Jack's Lament

Thursday, October 01, 2015

TBT: November 5, 2012


I'm really liking these Throwback Thursdays! I guess I just need a little inspiration to get a few things accomplished.
So here's a tag from this post; MESSY. I admit I was rather intrigued when I read it as I can't recall exactly what I was working on! I may have to take a trip down memory lane and revisit an old art journal to see what the heck I'm talking about!

Anyway, Autumn is my favorite season and this little tag was just so wonderful. I have other leaf stamps and this made me want to get them out and have some fun with tags!

Here's what I made:


The second photo shows off some of the embossing powder on the center leaves. (Lindy's Stamp Gang, Byzantine Bronze)
The background paper is stamped with a variety of inks using Unity Stamps, Autumn Grunge set. I used a larger piece then just cut it down to size.

Have a great weekend!
-Wy
"Happy Fall, y'all!"

Thursday, September 10, 2015

TBT: March 11, 2014


Time for another Throwback Thursday (TBT)! So here's a card I made for a challenge last year. The theme was GREEN and you can see the original post HERE.

I rather like it but it seems a bit plain in the background. It needs a bit more pop. 
So I decided to try it again. Keep a few things and change a few things.
Here's what I came up with:


I think I might have gone from one extreme to another. I pulled inspiration from the first card in the color (Green) and the owl (as I knew right where that stamp was!). I'm not in love with it but it did use up an ink spray background. It's different than the norm and I like it for that.

Have a great week end!
-Wy

Thursday, September 03, 2015

TBT: November 25, 2012


This Throwback Thursday is from Nov. 25, 2012. This was back when I first started making cards for display on the blog and for Challenge Blogs. I've always made cards for family and friends, and sometimes even for a craft/art fair or two.

This card was for a Lawn Fawn Challenge and used a stamp set I still have and love, Sunny Skies.
In fact, I just saw a couple of these stamps all ready to be colored on my craft table somewhere.
Hmmm, I wonder...

I just had to do a make-over of this card. Don't misunderstand, I like the card but I've learned so much since then and why not use what's just sitting there on my table?

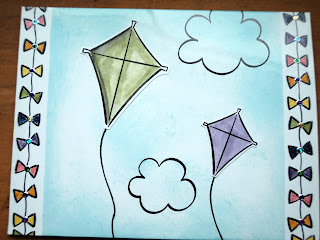
Here's the card I made today:

So I masked off the clouds and blended Distress Ink over the background. My kite and bird were already stamped onto watercolor paper so I just colored and cut. I used some blue paper from the Let's Polka pack to cover my card base then just popped on my little scene.

Not only have my card skills improved, but also my photography skills! (It helps when you got a new "true white" Ott lite to light up the scene!)

Have a great end of the week!
-Wy

Thursday, August 27, 2015

TBT: July 29, 2012


A new feature I'm trying to keep up with is Throwback Thursday. So let's see what old posts I can dig up.

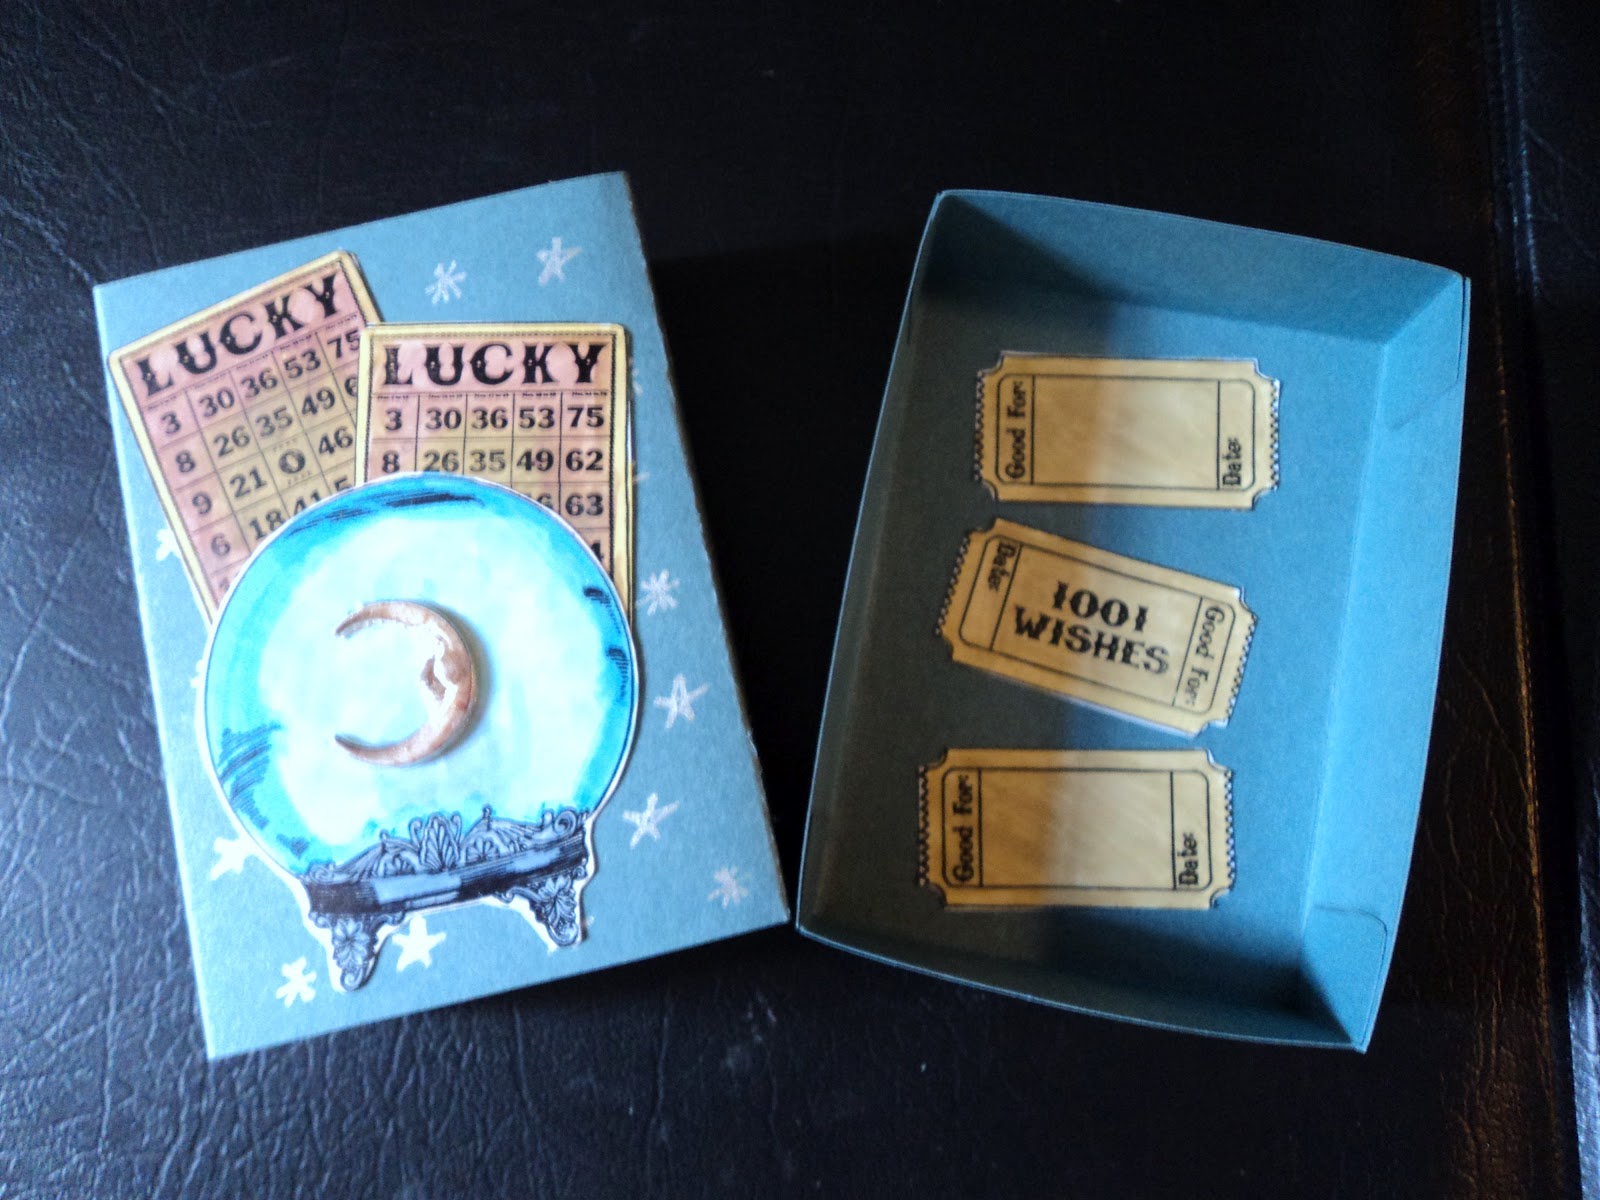
Here's an old post from July 29th, 2012 about a few projects I made with Coordinations cardstock and envelopes. I think I was trying to get on a Design Team for them. Good thing that didn't work out because I think those might have been my only ideas for using just plain ole cardstock!

The card wasn't too bad...I was apparently into ripping paper then, too. LOVE the torn edge look!

The envelope card was a bit random and I don't think I took very good photos of it.


But I still love my Matchbox for ATCs. I even made a few more of them afterward. The Coredinations cardstock is really good for that sort of papercrafting. It's very thick but still takes a good scoring. And the double-sided nature of some of the "packs" are very useful for boxes and such. With die-cutting being so popular (especially for boxes, gift bags, and other "some assembly required" items), this cardstock is a good thing to have in your stash.

Not that I have a lot of it...I still have the same paper pad that I used for all these projects! It was the Black Magic stack..one side of black, one side of a color.

This post reminds me that I should pull out the template I used to make these little boxes. It wasn't marketed as a template but I used it as such, and good thing I did, as the company (7gypsies) is now out of business. (So sad, I really loved their stuff with only one exception. Perhaps another time, I'll explain it.)

In fact, I just saw a good idea for using playing cards to make a countdown calendar for Halloween. This may be a cool box to store it in or give it as a gift! (Note to self...)

I even put a bonus card down at the bottom of the post and honestly, I still kinda like it. Another permanent addiction of mine seems to be circles.

In all of my de-stashing over the last couple years, one thing I have never let go of is cardstock. It is the most versatile medium for my creations. Yea, I get the urge to upcycle glass bottles and jars, and paint over wooden shadow boxes. But really, I like to make paper things...paper boxes, little tags, and my own versions of playing cards.
I have to get back to that.
I need to make more...little things.

Thanks for reading!
--Wy
"It's not one big thing; it's a bunch of little things."


Thursday, August 20, 2015

TBT: Fairy Queen

I've decided to start doing a Throwback Thursday here on the blog. I'll link back to some old post of mine and expound a bit on it as I see it "today".

So as I skimmed through my posts, I found this post about my Fairy Queen.

In looking it over, I have to say I still REALLY LIKE this canvas. In fact, I may just keep it. I've had it for sale but since she's still with me, perhaps, I'm meant to keep her.

In reading the post, I discovered that this was the first experiment I did with the Claudine Hellmuth acrylic paint from Ranger. Whew, they don't make that anymore. Guess what? I've still got that paint, though I have noticed that my white is nearly gone and all the others are half-used. I'm not quite sure what that tells me. Does that mean that I don't use acrylics enough? Or maybe, that a little goes a long way? Or that I don't LOVE them? I'm thinking it might be the latter.

While I dabble with acrylic paints, I'm not as in love with them as I am with inks. I LOVE spray inks, ink pads, watercoloring with inks, dripping with inks...about any coloring I do I like to do with ink. A close second is my Inktense pencils...where the "pencil" turns to ink with water...so technically...that's still ink, right?

And acrylic is so hard to put any layers over...because you can really only layer with acrylic. So while in my post, I stated that I may transition into the Dina Wakely line of acrylic from Ranger or even into Golden paints...I'm now doubting that.

So go see the old post about my Fairy Queen and how she came to be. She'll be with me for a while!

-Wy
"We become what we think about."  --Earl Nightengale

Featured Post

The Chocolate Game

 Let's talk about something sweeter than my other blog posts of late. Let's talk chocolate. But no guarantees that anything I want t...