Showing posts with label Lawn Fawn. Show all posts

Wednesday, February 03, 2021

Color Palette Journal: Reflection

 I've finally done another page in my Color Palette Journal. I've had the idea for a while but never quite got around to executing it. 

My Color Palette Journal is inspired by my Color Palette Pinterest Board. I randomly choose a palette and do a page in this particular journal with those colors. I may or may not be inspired by the photo attached with the palette. Once a palette is done in my journal, I blog it and remove the palette from my Pinterest Board so I will not repeat the exact same palette. (I do have very similar palettes on the board with different photos. Those stay.) 

So this was the inspirational Color Palette this time. Simply called: Reflection.


I have done artworks of lotus and water lilies in the past so I was not anxious to do one again. I have also experimented with mirror images and didn't think I wanted to take that route. So my journal page ended up being a simple theme I had wanted to add to the journal using these colors. The most challenging part of this palette was the lack of green. I did a scene and found it hard to work around the green/blue combo that I typically use for a landscape.


I changed my mind about where the "color" would go. I was going to have black dragons and a twilight background featuring the lighter purple color. I ditched the idea because the dragon stamps would lose their details. (Stamps and castle die-cut by Lawn Fawn.)

I rather like how this turned out. I also flipped through this journal as I hadn't looked at it in awhile. Once it's finished, I think I'll be making a video flip-through of it as I really like most of the pages. Don't hold your breath; I still have plenty of pages to complete!

Cheers to more creativity this year!

-Wy

Friday, July 03, 2020

Color Palette Journal: Desert Sky

I have decided to normalize the blog titles even though, here in the US, things are hardly normal. I'm not going to elaborate on the big picture with Covid-19 because it is nothing I can control. I can only control my own actions. I need to let the rest go. It frustrates me too much. It gets me all worked up. Soooo...

Let's talk about art journaling.

I find myself really liking my Color Palette Journal. I haven't had this much fun and satisfaction since I finished up my Sing Song Journal. (Go back through some old posts here on the blog to see pages from that. A journal inspired by the songs that I was listening to while I sat down to create.) Since my Pinterest board has over 200 color palettes still on it, I think I may be doing these journals for a while. I have come to the conclusion that I am mainly inspired by color. (duh) 

So here's the Palette that was randomly selected for this spread. I named it Desert Sky.
It's hard to tell if that really dark color is a very dark blue or black. I chose dark blue.
I had a spread in this journal that already had stamps on it. I used some Lawn Fawn stamps and set up a scene but I had never colored it in. So this palette seemed to work well for it.


Unbelievable: This came together quickly since I only needed to add color. My Nessie is a bit darker than I'd like but overall I like the page. It isn't great art but I think it's cute. The word is my word for the week because it's what I mutter to myself every time I turn on the news.

Wherever you are, please stay safe.
Stay home if you can. Wear a mask because it works! 
Wash your hands and social distance no matter what.
Please don't make this last longer than it has to. Be smart.
-Wy

Sunday, April 12, 2020

Global Pandemic: Day 28

Today is Easter Sunday in the Christian faith.

I am still staying at home with my parents and trying to figure out when the government might send me a stimulus check. We had a nice dinner and best of all, we have leftovers so I won't have to have a meal plan for tomorrow, at least.

I'm trying to make some art. I am hopeful for the upcoming week. I have a feeling I will be more productive.

I did manage to get a spread done in my Color Palette Journal.
Here's the palette that was randomly selected from my Pinterest Board. (FYI, I remove the palettes that I've done in my journal so I don't do them again. With over 200 there, I think I'll have plenty of selection.)
I named it Sunset Brights.

Here's the page spread I made.


I had been wanting to pull out my Lawn Fawn stamps so I decided to just use all the underwater creatures I had. I couldn't fit them all in there but I pulled out some of my favorites. I used some Liquid Pearls in neon colors for the bubbles.

Remember that we ain't out of the woods yet.
So keep staying at home.
Always wash your hands.
Wear a mask if you're out.
Don't be a jerk.
-Wy

Monday, March 28, 2016

Lawnscaping Challenge #126: Something Sweet


You can find the challenge over at Lawnscaping Challenges Blog.
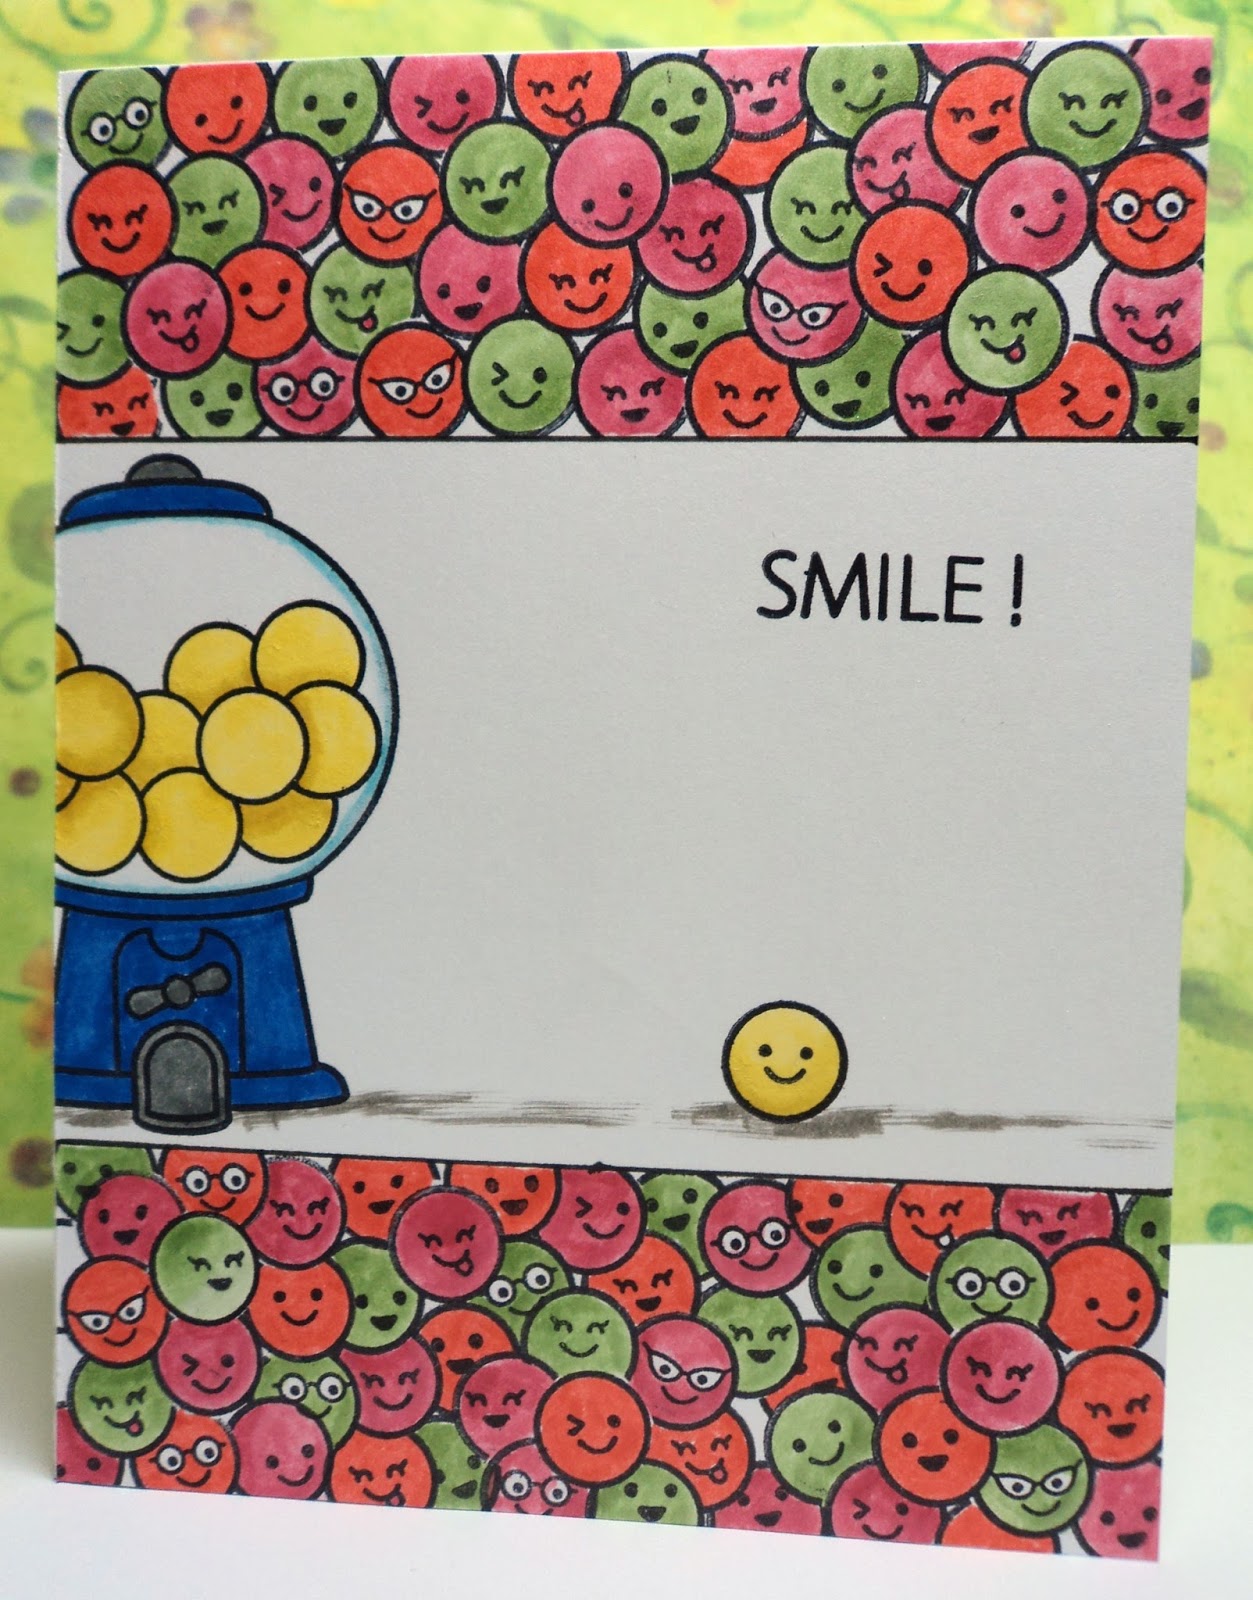
I made this card:

Happy Gumballs:   I admit that when I purchased this stamp set, Sweet Smiles, I wasn't sure it would get much use. I figured, if anything, I'd be able to use the variety of small faces in my art journaling. I had no idea it would be so much fun to stamp circles, give them funny faces, and color them! I've used this set more than I've used others that I had specific plans for!
The basic idea was to stamp a crowd of happy gumballs as a background. Knowing that'd be very "busy", I kept it contained in the top and bottom of the card. I wanted to be sure the single gumball, Mr. Happy, stood out. I masked the gumballs to get my "crowd".

For colors, I used Distress Markers in Mustard Seed, Squeezed Lemonade, Blueprint Sketch, Tumbled Glass, Hickory Smoke, Pumice Stone (shadows), Ripe Persimmon. I also used Gumball Green and Primrose Petals from Stampin' Up. (I used the stamp pads with a blender pen as I don't own many of their markers. It worked great! And how can you NOT use a color called Gumball Green?!)


Have a great day!
--Wy
"A smile increases your face value."

Monday, March 14, 2016

My Gnomey


I haven't participated in a card/papercraft CHALLENGE in a long time. Sometimes you just get worn out. But then, spring comes...

This little card is for two challenges:
The Simon Says Stamp Wednesday Challenge where the theme is a Bit O' Green and for
the Lawnscaping Challenge where the theme is Color Splash.
 

So I dug out a "new to me" set of Lawn Fawn stamps. Gnome sweet Gnome. I bought this set to go with the newer Fairy set but the little Gnome is so versatile. He can be a garden gnome, a leprechaun, or even Santa Claus! I'm sure I'll get a lot of use out of him!

Just a cute little card to get me thinking of new things for spring.
--Wy
"Ah, but cares of tomorrow can wait till this day is done."  --song, "Come by the Hills", (Irish Rovers)

Sunday, March 06, 2016

Pocket Letters: The 1st Four

Ok, so I'm making pocket letters. Sort of. Haven't heard of them? Check YouTube or go HERE to learn more.
I'm not really doing any swaps, just making them for family. I might work my way up to some swaps. Who knows? I love ATC size or playing card size but pocket letters also seem to involve little "gifts" that I'm not so much interested in. It's also an offshoot of pen pal-ing which I never had an interest in.

So I decided to do a pocket letter for each month of the year for my niece. I've got the first 4 months done and she might even get them before Easter. LOL! I don't put too many "gifts" in the pockets...mostly just stamp images that are fussy cut or colored and maybe some stickers.

I have discovered that it's a great way to use up little scraps or to make a small stamp image be a cool focal element. I also like how you can stick to making each card different or linking some of them together to be a larger image. It has it's own challenges. Like do you cover the back of the card or not? I do mostly, unless it's practically spotless on the reverse side. But I like the consistent look of the reverse side when it's all covered with a similar color or paper.

So here we go:

January:  Mostly this was inspired by the background paper.  It's a mop-up page from my Art journal. It just looked cool and wintry. I was going to make cards with it but it cut up into 7 cards. I used a leftover bit for another card and just a plain white cardstock for the last. I wanted some consistency throughout the months so I knew one card would be the name of the month and the year and there would be a card or two for any major holidays. I, then, established a little personal touch by adding a card with "3Things I like to do in January". The rest of the cards just match the winter theme, and color. (I added some gifts to the back of the pocket like a cut-out of the yeti and penguin stamp image. I also had some acrylic snowflakes and some build-your-own snowman stickers. Lastly, I added some small blue beads in a little ziploc bag.)

Winter Fun Penguin:   I got this small stamp set from Hot off the Press as a mistake. (Instead of shipping me my order a while back, I got some stamping kit of the month. They were kind enough to let me keep it. This little set was cute but I wasn't a fan of the bigger set. It'll probably go out to a second hand store.) I used the background to guide my stamping so that the words seem framed by the swirls.


New Year:  These stamps are also from a set from Hot off the Press; a new steampunk set. I had been making a card for a friend and had them out. The sentiment seemed worthy of a New Year's occasion. I added some green Distress ink around the edges of this one to bring out some of the green splatters in the background of some of the cards.

February:  With Valentine's Day in this month, I knew I had to have some pink. It's my niece's favorite color. But I added the purple because it looks neat and amethyst is the birthstone this month. I might have overdone it with the purple but I screwed up a pink card and couldn't save it. The pink paper was only a scrap and I didn't have any more of it. (The gifts in the back of this pocket letter were just some cut-outs of the stamped images. I added a skunk and a few of the owls with added google eyes! I also threw in some heart stickers.)

Sweetheart Owls:   This stamp is one of those from Studio G that you find in the dollar bins at Michael's. I love to cut out the owls separately and back them with patterned paper. I added some Liquid Pearls (Platinum) to the heart in the girl owls wings. These owls also look super cute with googly eyes!

Quote:  I thought it would be fun to add a quote. This one is from Helen Keller. (Unfortunately, I just didn't add any more to the next months...too many other ideas!) It wouldn't fit horizontally so I went with a vertical layout. Those roses are from a hand-carved stamp I made and they are about the size of a penny.

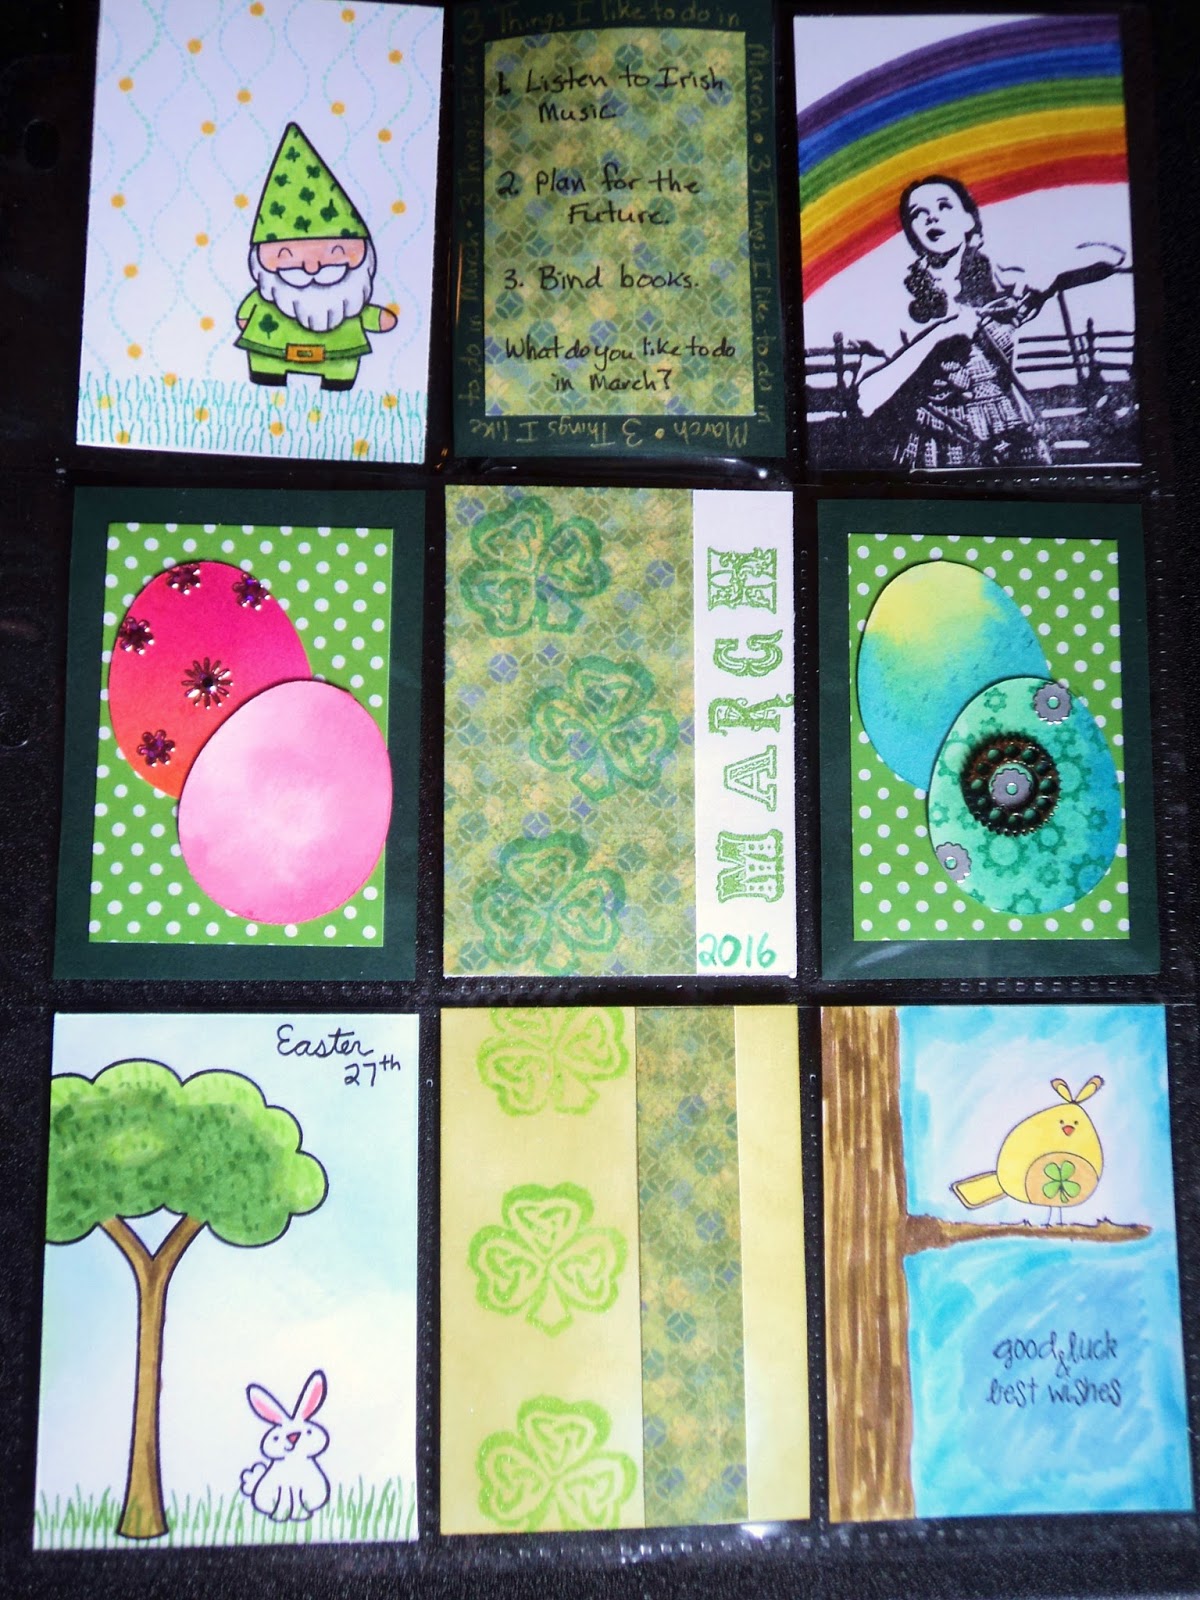
March:  I wanted each month to be specific to 2016 which means that March contains both St. Patrick's Day and Easter. This made the composition a little more complex. I decided to go mostly with St. Patrick's Day with just some touches of Easter. (For little gifts in the back pockets, I added some Easter eggs like you see on the cards in the middle, some shamrocks, a few rainbow stickers, and a small journal that I bound from scrap papers.)
Leprechaun:   I admit that I may be addicted to Lawn Fawn stamps! I bought the set Gnome Sweet Gnome a while ago when they had a big sale but I hadn't used it yet. I thought the Gnome could be used for several different things besides a garden gnome. (Like this leprechaun or a Santa.) So I used the grass in the set to set a lawn and used the wavy dotted line to make it appear like coins were raining down.

Over the Rainbow:  I figured what went better with St. Patrick's Day than a rainbow? So I found this old stamp that had been hand-carved by JackBear Stamps. I added the rainbow behind Dorothy with Distress Markers. I decided that this card didn't need much because that stamp is so cool.

Easter Bunny:  More Lawn Fawn stamps! This is from Critters in the Burbs set. I went with a clean and simple approach and I like it that way.

April:  Without Easter to contend with, April was looking pretty empty for "occasions". While April Fool's Day was an idea, it didn't seem to fit with where I wanted to take this page. I focused on April Showers and Earth Day. So ended up with lots of birds in yellows and blues. (For little gifts, I just added a lot of homemade stickers made from the chick stamp and the kite stamp. I left them white so my niece can color them.)
Rainy Day Owl:   This is a stamp from Unity Stamps. I came in this set and I adore it! I colored him in after I had all the other cards finished so I could make sure he matched my color scheme. He's colored in with Distress Markers. 
Marching Chicks:   You can see I used my new Feathers stamp set here from Hot off the Press. The cute chicks are from Unity Stamps. I colored them and cut them out some time ago and just pulled them out of my stash. I like to stamp many images at once and color them up or just have them cut out and ready to go. I wanted the two cards to mash together to make a nice block at the bottom of the page.


That's what I've got done for the year for now. I'll be starting the next 4 months soon! Stay tuned.
-Wy

Thursday, September 03, 2015

TBT: November 25, 2012


This Throwback Thursday is from Nov. 25, 2012. This was back when I first started making cards for display on the blog and for Challenge Blogs. I've always made cards for family and friends, and sometimes even for a craft/art fair or two.

This card was for a Lawn Fawn Challenge and used a stamp set I still have and love, Sunny Skies.
In fact, I just saw a couple of these stamps all ready to be colored on my craft table somewhere.
Hmmm, I wonder...

I just had to do a make-over of this card. Don't misunderstand, I like the card but I've learned so much since then and why not use what's just sitting there on my table?

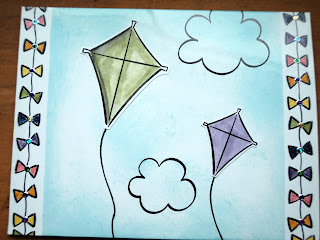
Here's the card I made today:

So I masked off the clouds and blended Distress Ink over the background. My kite and bird were already stamped onto watercolor paper so I just colored and cut. I used some blue paper from the Let's Polka pack to cover my card base then just popped on my little scene.

Not only have my card skills improved, but also my photography skills! (It helps when you got a new "true white" Ott lite to light up the scene!)

Have a great end of the week!
-Wy

Tuesday, June 16, 2015

The Firefly Card

Seems like forever since I had a project to share! Every day I've had available to craft, I've felt...not-so-good. But finally on Sunday, I got something done! And bonus!...it lights up! I'm linking this project up to the Lawnscaping Challenge, too!)

Chibitronics makes it possible. I am having a fun time with my Starter Kit and a few extras. Check out their site for great ideas and see what's possible. I highly recommend the Starter Kit! It has all you need to get started and to make this card. (Except the strong magnet. Those magnets can be found HERE.)
I highly recommend reading the Sketchbook from the Starter Pack for more detailed info about how circuits work and can be designed. It's far too much to include here. But the directions in the Sketchbook are easy to understand and take you step by step through making your own circuits.

Here's my finished project:

I used Lawn Fawn stamps from the Critters in the Burbs set and from Summertime Charm set.
Light up cards aren't hard to make so long as you plan it out first. The stamped portion of my card is a separate panel that I attached to the card base so I could hide the circuitry.
In a nutshell, you need only a few things to make a light-up card: a power source (battery), a conductor (copper tape), lights (LED stickers). In essence, you connect the positive from the battery to the positive on the light via copper tape. Same with the negative. Don't cross them...you'll get a short circuit. That's the basics.

Here's the process:
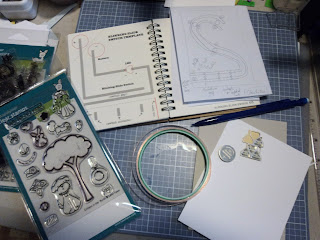
1. I gathered up my materials. I basically pulled out my Chibitronic Starter Kit, some stamps, a card base and extra panel, a pencil, and adhesive. My idea was to stamp a night scene with fireflies that would light up. I sketched out a little scene on scrap paper so I had an idea of how the finished card would look.

2. Sketch out a "skeleton". I call the internal circuitry, the skeleton, of the card. I didn't want all my copper tape to show and I wanted the small LED lights to shine through the paper/cardstock. The photo above shows my first attempt at sketching out the skeleton. It wasn't going to work. The left side shows a page from the Sketchbook that comes in the Starter Kit...it was what I wanted. A Blinking Slide Switch. So when you run your finger along the bottom of the card; the LED sticker lights would blink on then off then on...
(The card doesn't end up this way because I goofed it up. I'll explain some at the end of this tutorial.) The above sketch wasn't going to work so I tried another sketch as seen below.


3. Plan out your lights.  I stamped out where I wanted the fireflies to be (those round circles) and penciled in lines to connect them. I need a continuous line for the negative. I need two lines for the positive because that is where I'll place my switches. The negative line will run from the battery through the lights then end on the front. One positive line will connect all the lights and then form a line along the bottom of the card. The other positive line will run along the bottom of the card and connect to the battery. (The actual switches will be added later. They go on the back of the front panel.) The lines are going to be my guide for laying down the copper tape. They trail off the edge of the card front because the battery is going on the inside of the card. So the tape has to wrap around to the other side.


4. Lay down the copper tape. Following the lines of the skeleton, I laid down the copper tape. (Refer to your Sketchbook for tips and tricks on how to lay it down.) I just followed the lines making sure to keep it continuous. I used the outline of the LED stickers to approximate how much space to leave between the positive and the negative lines. The LEDs need both lines to touch so make sure not to leave too much of a gap. You also don't want the positive tape to touch the negative tape or you'll have a short circuit.
 

5. Connect the tape to the battery. The copper tape has to wrap around the edge of the card in order to connect to the battery. Just wrap it around to the inside of the card and end them. I like to trace around the battery so I know where it's going to be placed. The battery is placed along the fold of this card so the tape hits both the positive and the negative when the card is shut. THAT will power the lights.
6. Test the circuit. I always test the circuit when I've got it done. So I add the LED stickers to my preselected locations making sure the positive end is touching the positive tape and the same with the negative. Once my LEDs are secure, I add the battery to the inside of the card and close it. Because I have a SWITCH in my design, the lights will only get power when the gap is bridged by copper tape. So to test, I laid a small piece of tape along the gap where I can press.
 
I placed the blank panel over the top of the card and pressed. The LEDs lit up! Circuit is good to go.
With the skeleton complete, I can now work on the front panel of my card.

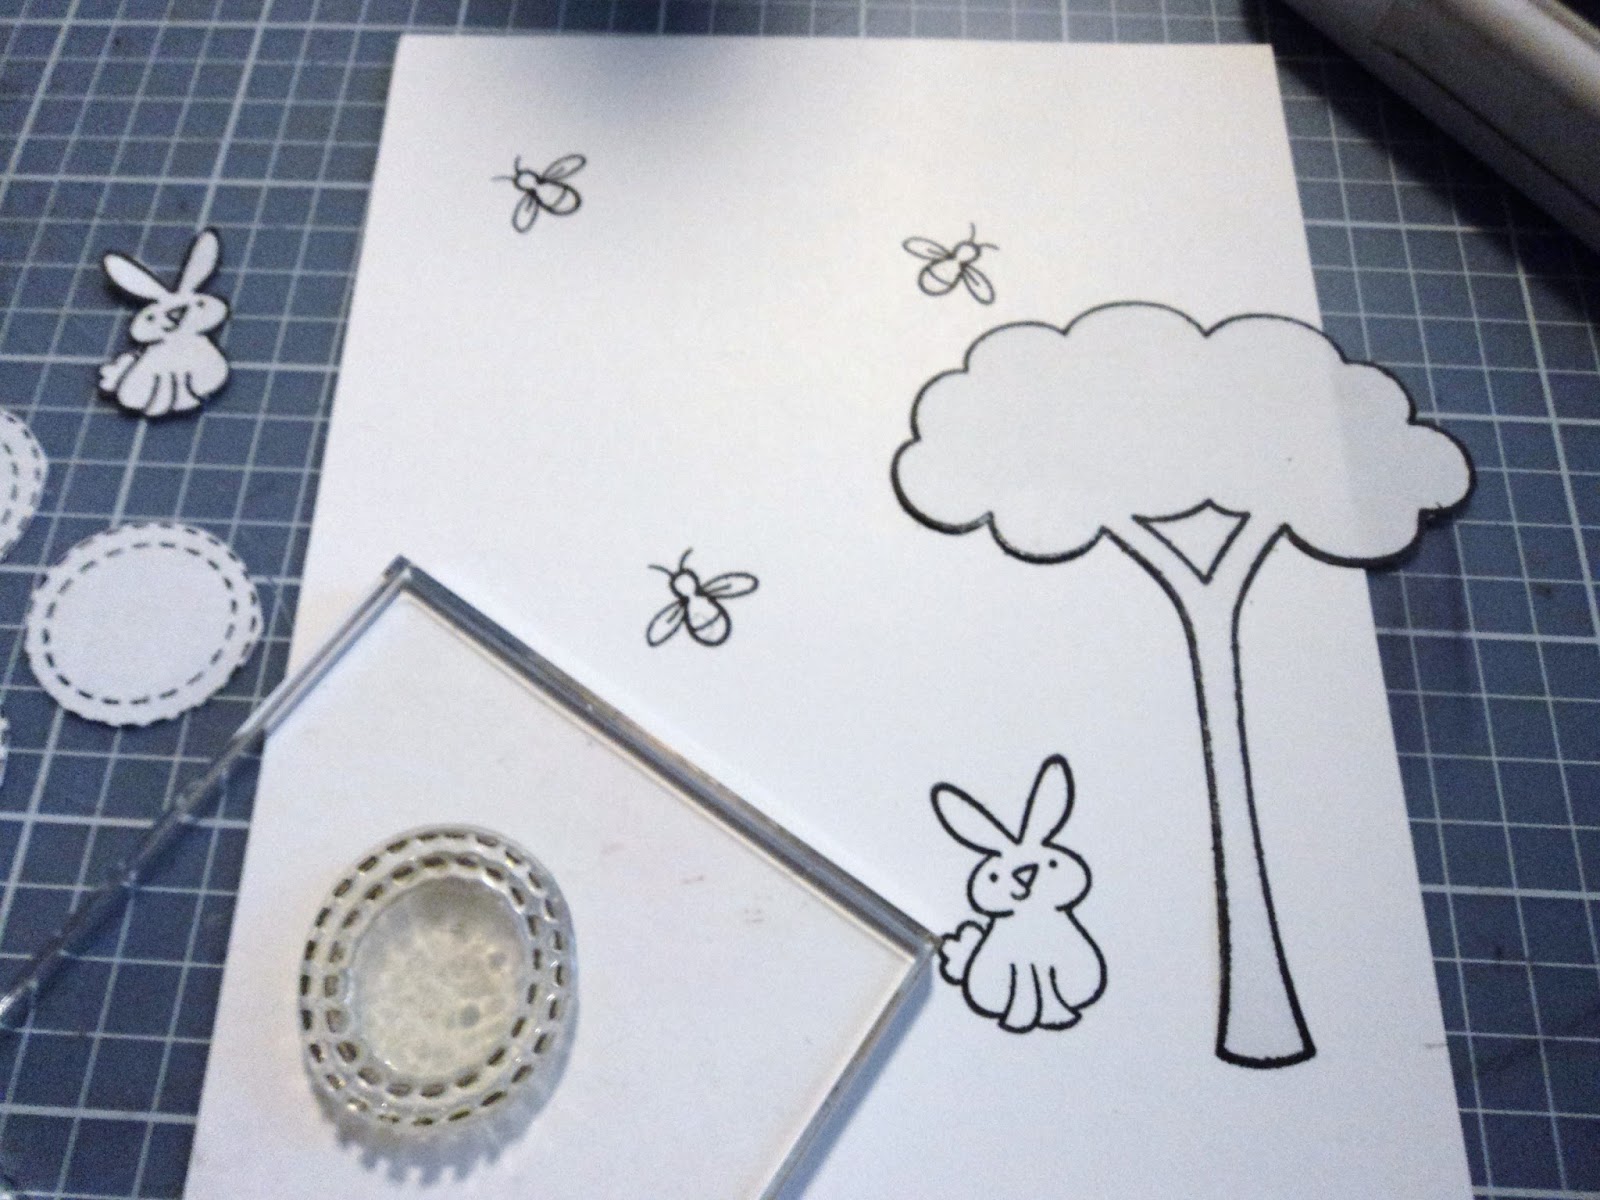
 7. Position the fireflies. While the test lights were on, I made a little circle with my pencil as to where they showed up on the front panel. That's where I want to stamp my fireflies so that they are aligned with the LEDs underneath the panel. Once I had those stamped, I just positioned the rest of the stamps around them. I cut masks for all the stamps; the tree, the bunny, and the circles. I was going to ink the background and I wanted these places to remain white so I could color them in. 

8. Ink background. With the masks in place, I began to ink the background to make my night sky. I started with Distress Broken China, then added Midnight Muse (Stampin Up!) (Distress Chipped Sapphire would also work here!), and finally blended a little Distress Black Soot just along the upper edges. I used a sponge to apply all the inks directly to the front panel.


9. Remove masks and color. Once my background was the way I liked, I pulled off all the masks being careful not to get my inky fingers onto the white areas. Then I colored in the images with Distress markers. I added a strip of green patterned paper to the bottom to give a horizon line and to house my sentiment.

 10. Attach panel to card. It was time to add the switches. Switches are just little pieces of copper tape added to the back of the FRONT PANEL. So when the front panel is attached to the front of the card, the tape can be pressed into the gap to complete the circuit. Once my scene was complete, I added double stick tape along the edges of the back of the front panel and lined it up with the card front. Once I added my battery to the inside, and pressed along the sentiment, the fireflies all lit up!


So here's my Ooopsy: remember when I set up my circuit it was supposed to make the fireflies blink? Well, that didn't happen. I believe I placed the switches too close so that when I pressed the first, it also connected the second so the fireflies never blinked off as I ran my finger along the edge of the card. But hey, it's a learning process and I like the card as it is. They light up fine!


 11. Attaching the battery. The battery just has to make contact with the copper tape. When the card is shut, just holding that corner will make that connection. I added the small magnet to the back of the card to hold the battery in it's proper spot. That magnet holds the battery to the inside of the card so that it doesn't fall out. I then taped the magnet to the back of the card so it wouldn't shift in an envelope.
Lastly, I just added a few stars to the sky with a white gel pen.


Whew! Finished!
This card is a real show stopper. Although I goofed up my blinking switch, I still love the card and it lights up so wonderfully. Photos can't do it justice. These little LED lights add a Wowza to an otherwise simple little card.

If you want to recreate this card, you can find all the things you need for any light-up project at Chibitronics. The Starter Kit is well worth it and you get enough supplies for several projects!

I'm planning out my next light up adventure already...perhaps a paper lantern or maybe a banner? Hmmm...
Thanks for dropping in.
--Wy
Lawnscaping Challenge #108: Stars and Stripes


Featured Post

The Chocolate Game

 Let's talk about something sweeter than my other blog posts of late. Let's talk chocolate. But no guarantees that anything I want t...