Showing posts with label 3-D collage. Show all posts

Thursday, October 01, 2020

Dearly Departed


It seems almost fitting that I begin my October posts with this shadowbox of a graveyard scene. I recently lost my cat friend of 3 years and I see that this project I made has a cat in it. sigh.

Anyway...I decided that this year was the year to use the stash of vignette boxes and shadowboxes I have accumulated. It's only around Halloween and Christmas that I am inspired to make anything of them so I wanted to use as many as possible. I tried not to buy too many new things for them but I couldn't help myself with a few elements that just added to my ideas. 


The bottom half of the box depicts a small graveyard scene with tombstones, an urn, and black cat. The upper half of the box has a baseboard frame with a vellum scene inside it. I used collage elements to add a bit of detail to the frame as it seemed rather empty on it's own.


I was greatly inspired to add lights to things this year. So that was the main purpose of this project. I was experimenting with working with the tiny lights (Tim Holtz; Ideaology). When adding lights to things, you need to plan ahead if you want to conceal the "wiring" and have a place for the battery compartment. Sometimes, it's too much planning for me when I just want to sit down and make a project.


I selected this shadowbox to use because it already had some open tabs in it. (From Alpha Stamps, the tabs are meant to hold shelves within the box. I left the shelves out to utilize the holes.) This allowed me to put the battery box on the back without having to worry about drilling a hole or something. I made the little holder for the battery out of thick cardstock.


 It's hard for me to get a good photo of it all lit up as when I dim the lights, you can't really see the elements. (I'll try to improve for future projects. Hint, hint.) The purple tiny lights are much more diffuse and light up the vellum scene with a wonderfully eerie glow.

I'm not sure I'm "in love" with this piece but it was fun to make. I do like the vellum scene, not so much the collage I did on the frame. Certainly it's a cool display on my book shelves. 

I will be posting inconsistently this year. No set structure or dates for new posts. I'm winging it as we all have during 2020; why should October be different? Follow my Facebook page to keep abreast of new posts and projects. I will also be sharing any Inktober(TM) prompts that I attempt. (Just a note that I don't plan on completing it this year. I'm already off to a bad start on Day One and it's a prompt I don't consider too challenging. Ugh.)

So the word for this October will be Inconsistent. 

Hang in there wherever you are. Wear your mask, social distance, and vote!

-Wy

"Here in the silence, dark and deep, I offer you eternal sleep." Love ya, Cloudy. RIP 9/27/2020

Sunday, October 28, 2018

Display Case

I'm not sure what this is called, a display case, a shadow box, an ATC holder. The panels are a bit larger than ATC size and I'm not even sure if these things are still made. I have a few kicking around that I've been meaning to decorate but you know how that goes.

Anyway, I wasn't sure this project would even get done for this October as it was sort of a last minute addition to my line-up. But once I pulled out all the vintage Halloween postcard ephemera, I knew I had to get this done. My brother collects vintage Halloween postcards. He has a fascinating collection. The actual postcards are pretty valuable and I remember the weird and spooky images that were associated with them.

So this project is an ode to those old postcards that creeped me out with all those "vegetable people".
OMG! The potatoes have eyes!


(I apologize for the shoddy photos. It's very difficult for me to get a good shot of all the little boxes. But you get the idea.)


I tried to stick to my Witch theme but not all my ephemera had a witch. But black cats are often the witch's trusted familiar so I figured I was ok with these two. The pumpkins are those Tim Holtz Ideaology pumpkins that came out a couple years ago. These are foam so they can be cut and that's how I got them to stick into the boxes. I shaved off the back to make it flat and glued them in.


I was also (again) trying to use up little scraps and the "last ones" of things like rhinestone stars, flowers, brads, buttons, and that strip of ribbon along the bottom.

Naturally, one of my boxes had to have some potion ingredients!


My "bone collector" may not fit into the witch theme so that's why he's has that funky green background.


The Tim Holtz chipboard words and phrases came in very handy. They are sturdy enough to be glued to the outer edges of some boxes that needed an extra touch.


Again, apologies on the photo quality. There's always that one project where I just can't get any good light or angle. sigh.

Hope you enjoyed this little project!
See you on the 30th and 31st for the last of the Halloween posts!
-Wy

Sunday, October 14, 2018

The Wiccapedia

Halloween is about the only time of year I get the urge to do assemblage, or work in 3-D, like making boxes, vignettes, or other décor pieces.

I'm not sure what to do with them after I create them as I have limited display space. So if you haven't been to my Etsy Store, be sure to drop by as many of these artworks will be for sale.

This year I pulled out a Tim Holtz Configuration book. If you are unfamiliar with it, it is a hollow book/box with several compartments within. It is blank and made of a chipboard material. The compartments can be removed and re-configured. It was the number, shape, and size of these compartments that inspired my idea.


The Wiccapedia:   A spell book seemed too common place and I wasn't sure how to interpret that into a 3-D type medium. My idea came about as I was playing with the various configurations of the compartments in the book-box. I realized I generally had 4 "areas": large, medium, small, and 3 squares. I knew I wanted to add my witches into the large compartment with a woodland setting (very traditional). I thought about the many forms of "witches" beyond that traditional stereotype. After all, alchemists were practically witches, trying to turn iron to gold. And alchemists led into the modern day mad scientist who bends physical laws to defy nature. Of course, voodoo is just another language of witches, really, with curses and zombies. So this became the book. The 4 forms of a witch and what better title that the all-encompassing "Wiccapedia". I'll chime in a few details but enjoy the photos. It was challenging to get good ones with the weird reflections I was getting off of glass jars and such.

Since I didn't have enough letters to spell my title, I had to be a bit creative. Who doesn't want an eye staring out from the cover of their book? 


I also added a key and a little dangle pendent of amethyst that I have been holding for the perfect project. I painted the entire book/box black and then added highlights of Inka Gold (gold color). I also used this gold to color the "pages".


This is the configuration I settled on but it can be moved about on a whim. The pumpkin is a little too wide and it prevents the book from closing flat but I don't mind it. I'm not certain if at some point I will add something to the inside cover as I like it as it is. That paper reminds me of the inside of vintage books.
Here are the compartments:


The Witches:  (This one compartment is what I really wanted to make.) A couple of witches casting spells out in the woods late at night. Maybe they're waiting on the rest of their coven, or perhaps a tardy sister. Either way, they already have the cauldron boiling. A stray black cat seems to have taken an interest in their experiments. The pumpkin awaits a carving to light their way out of the woods. They hear the approach of footsteps. Is it their sister or some ambitious Scot?


The Mad Scientist:  In this day and age of fake news and fake science, I was hesitant to add him. Science is fact, truth, proof. But the mad scientist is indeed a sign of our times. He takes scientific fact proven by tested methods and twists them...perverts them to his own imaginative design. He mingles science with magic in hopes of greatness. He is a classic character of Halloween fright.


The Alchemist:  The three small boxes are the shelves of the Alchemist. His precious bottles of potions, ingredients, and various concoctions fill every nook and cranny. His books are old but cherished. He ponders the power of life through the eyes of his skulls and swears the spirits answer him when he questions his methods. Perhaps, he is getting close to his ultimate goal as his familiar frog guards his precious golden potion.


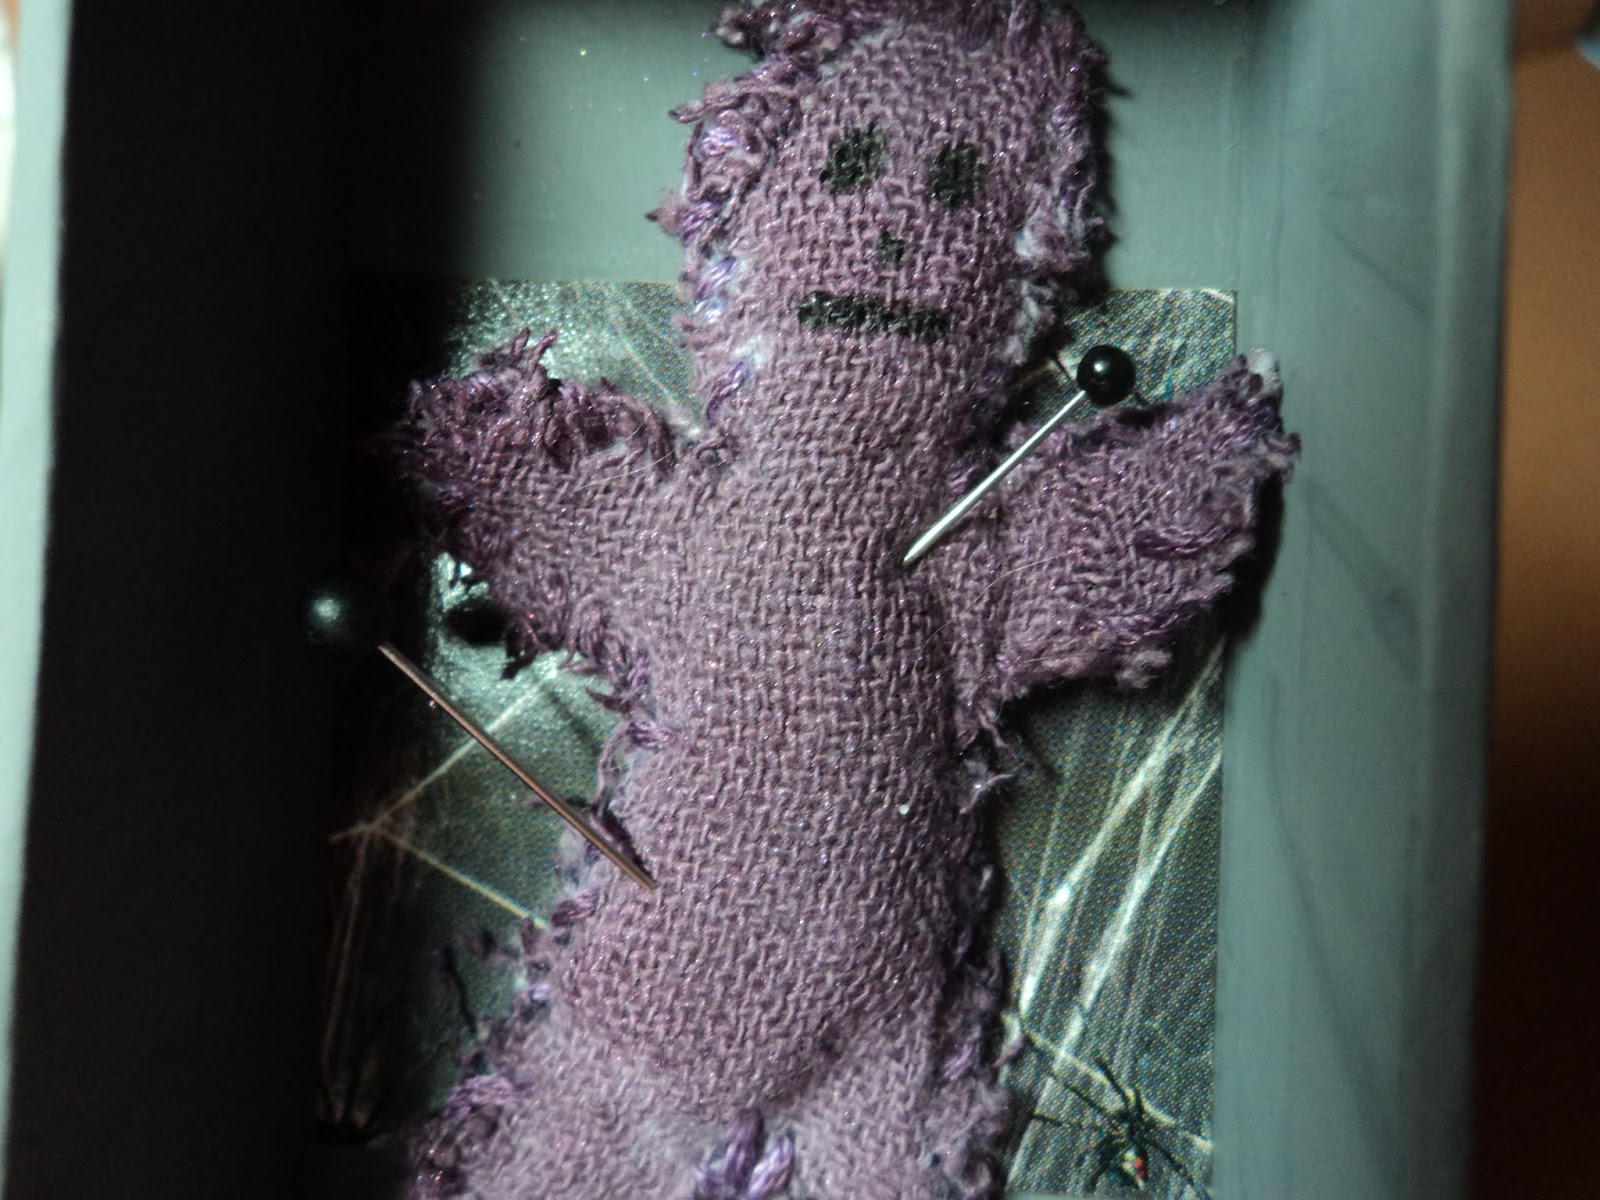
Voodoo Witch:  The only trace that the Voodoo Witch left behind was this doll full of pins. Hand sewn and frayed, who knows who this unfortunate soul is? One can only wonder where the last pin would have gone had the witch not been in a hurry to leave. No doubt she has a zombie or two to raise tonight.


Maybe it's best to shut the Wiccapedia for now. I wouldn't want too much to escape.

Have a great day!
Remember to join me every Sunday, Tuesday, and Thursday for the month of October to enjoy more Halloween projects!
-Wy
"Ride with the moon in the dead of night."

Tuesday, October 17, 2017

Halloween Collage Canvas

I told myself last year that I needed to use up the Halloween paper I had before I could buy more. I thought that would be a great incentive to use my supplies and it worked. Sort of. The problem was that I had SO MUCH Halloween paper I was running out of ways to use it. I think I could cover the continent with whimsical, glittery Halloween paper.

The real problem was that I am no longer into that style. I like cutesy, whimsical things at Halloween but my great passion at Halloween is strictly Victorian, classic and basic black. Candy corn colors no longer get me quite as excited as a moldy old skull pattern or a classic woodcut Jack O'Lantern.

That said, I still have tons of that paper. So I decided to make myself slightly happier with using it. I'll tear it up! Nothing makes me happier about throwing out paper scraps than scraps that are torn anyway.

I had this long canvas that I wasn't quite sure what to do with anyway.
But then I had an idea.


I can't tell you what paper pack/pad these are from but they were all from the same set. I've had it quite a while. The paper tore very well! I just started at one end and collaged my way to the other end. I saved out a few larger images to place over any gaps I might have.

Now my focal point is a series of small canvases. They measure about 2"X 2" and I got them in a craft store thinking I could make a quick magnet out of them. I found an old sticker alphabet that fit perfectly on them. So the letters and the squares are the stickers and the black background is the canvas. The letter stickers were a bisque-like white color so I painted them. It wasn't too bad of a project as the letter is raised from the surface so it was easy to isolate.


I added just a few bits and bobs for a bit more dimension. Old buttons, flowers, and rhinestones mostly.


I'm trying to take better photos so took this canvas outside.

So you're asking yourself, did she use up all her paper stash? Hell, no!
Will I throw it out now? Hell, no! I'm a paper addict. I couldn't possibly throw out a perfectly good piece of paper even if it is ugly or out of date. Don't talk crazy!

Here's hoping I find something to do with it before next Halloween! (or you'll be seeing another canvas like this one next year!)

-Wy
"Abracadabra!"

Tuesday, October 03, 2017

Coffin Box

I admit that I secretly have a "thing" for boxes, bottles, and tins. I am currently hoarding a few tins, several boxes, and a couple bottles in hopes that I'll alter them into amazing home decor pieces.

HA HA HA HA HA HA!

In October, though, my ambitions can become realities. I am always inspired by Halloween. My interest in assemblage was peaked last year at this time with several 3-D projects and I decided to keep to the tradition.

This project started as a wooden coffin hinged box that I bought at some big box craft store on sale. I intended to make it a non-functional box (as in, the thing would be filled with a scene) but I liked the idea of it being usable as a storage box. Where else would I look for my small Halloween embellishments?


I painted the box black with cheap acrylic paint. I didn't bother to gesso. I just used as much paint as needed to cover the bare wood. Once dry, I applied Inka Gold (black color) to it. This gives the outside a silvery metallic hue without compromising my deep black. (In other words, I wanted it to have a luster but not a sparkly feel to it. I was going for Bram Stoker Dracula not Twilight Vampire.)


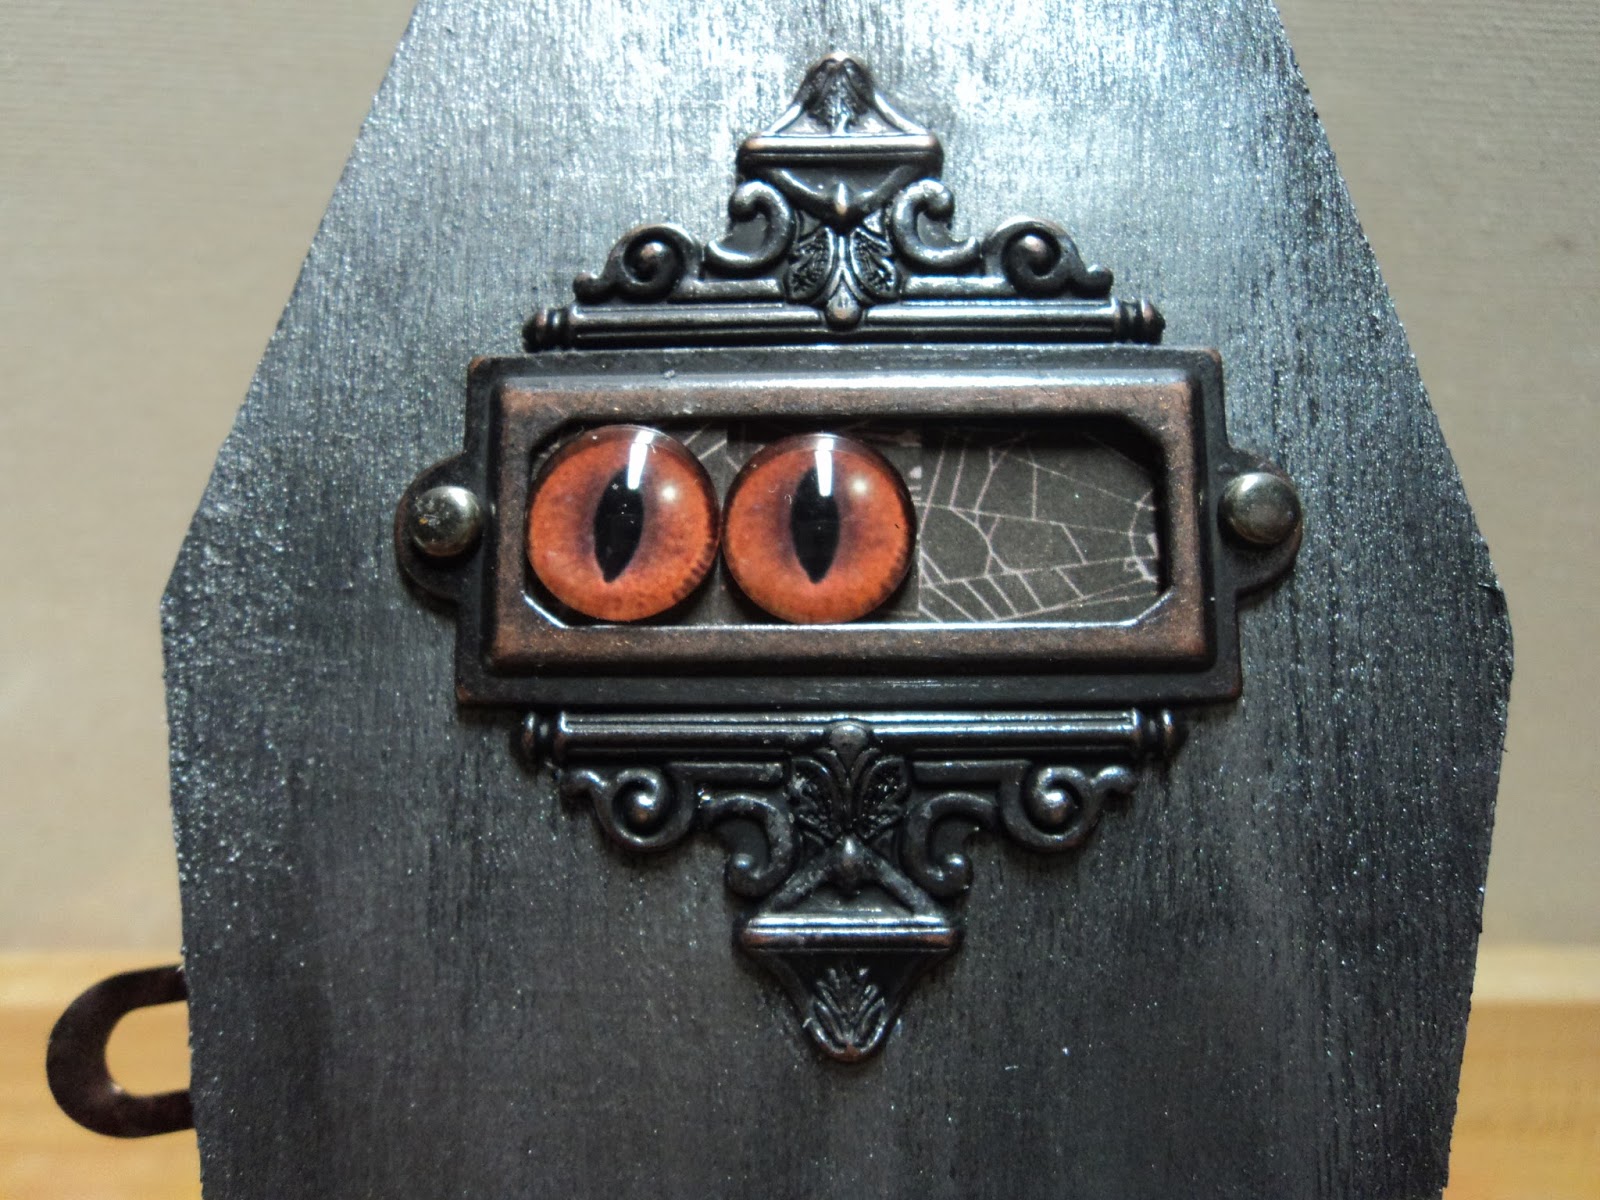
My next decision was what to put under the ornate plate I was going to use on the lid. I thought about a name or a word but then I noticed that the space allowed a dimensional item. I remembered these eyes I had and fortunately, I put my hands on a pair of them without too much trouble. I glued a piece of paper to the coffin lid, lining it up so that the plate would fit over it. The eyes were glued to another piece of the same paper but cut smaller. In essence, I made a slider mechanism out of the plate and the eyes freely slide back and forth. As you can see in the above photos, the eyes are on the left then on the right. I tried to glue the plate to the lid but the plate wouldn't lay flat. So I poked a hole in the lid and attached the plate with two brads. The plate, along with the latch and hinges, were colored with black alcohol ink.


I only really finished off the inside with paper because I needed to cover the inside of the lid where the brads could be seen. I found a nice piece of paper with a skeleton that fit in the box. Since I wanted it to be a storage box, I didn't do anything else to the inside.


As a final touch, I added rhinestones and pearls along the outside of the lid. I just wanted to add a bit more detail out there. But honestly, I would have been ok without them. Because it was all about those eyes on the cover. I mean, I LOVE those.


Join me every Sunday, Tuesday, and Thursday in October for more Halloween projects!
-Wy

Featured Post

The Chocolate Game

 Let's talk about something sweeter than my other blog posts of late. Let's talk chocolate. But no guarantees that anything I want t...