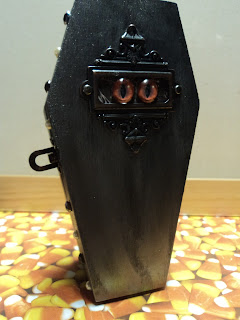
I admit that I secretly have a "thing" for boxes, bottles, and tins. I am currently hoarding a few tins, several boxes, and a couple bottles in hopes that I'll alter them into amazing home decor pieces.
HA HA HA HA HA HA!
In October, though, my ambitions can become realities. I am always inspired by Halloween. My interest in assemblage was peaked last year at this time with several 3-D projects and I decided to keep to the tradition.
This project started as a wooden coffin hinged box that I bought at some big box craft store on sale. I intended to make it a non-functional box (as in, the thing would be filled with a scene) but I liked the idea of it being usable as a storage box. Where else would I look for my small Halloween embellishments?
I painted the box black with cheap acrylic paint. I didn't bother to gesso. I just used as much paint as needed to cover the bare wood. Once dry, I applied Inka Gold (black color) to it. This gives the outside a silvery metallic hue without compromising my deep black. (In other words, I wanted it to have a luster but not a sparkly feel to it. I was going for Bram Stoker Dracula not Twilight Vampire.)
My next decision was what to put under the ornate plate I was going to use on the lid. I thought about a name or a word but then I noticed that the space allowed a dimensional item. I remembered these eyes I had and fortunately, I put my hands on a pair of them without too much trouble. I glued a piece of paper to the coffin lid, lining it up so that the plate would fit over it. The eyes were glued to another piece of the same paper but cut smaller. In essence, I made a slider mechanism out of the plate and the eyes freely slide back and forth. As you can see in the above photos, the eyes are on the left then on the right. I tried to glue the plate to the lid but the plate wouldn't lay flat. So I poked a hole in the lid and attached the plate with two brads. The plate, along with the latch and hinges, were colored with black alcohol ink.
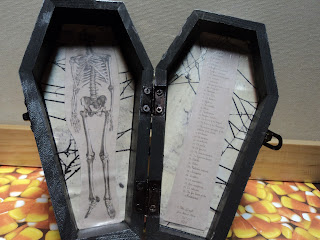
I only really finished off the inside with paper because I needed to cover the inside of the lid where the brads could be seen. I found a nice piece of paper with a skeleton that fit in the box. Since I wanted it to be a storage box, I didn't do anything else to the inside.
As a final touch, I added rhinestones and pearls along the outside of the lid. I just wanted to add a bit more detail out there. But honestly, I would have been ok without them. Because it was all about those eyes on the cover. I mean, I LOVE those.
Join me every Sunday, Tuesday, and Thursday in October for more Halloween projects!
-Wy


No comments:
Post a Comment