Showing posts with label Bugaboo stamps. Show all posts

Sunday, November 02, 2014

Red Carpet Studio Challenge #82: Marley & Me

Time for another Red Carpet Studios Challenge!!!
The movie this time is Marley & Me so the theme is ANIMALS. Make a paper craft project with this theme and link it up over on the Challenge blog and you might win this:


It's a little something I threw together for the winner! I admit that I pulled it out from my stash...unopened packages and brand new stuff that I never got around to using and probably never will.

Here's my card for this challenge:


Party Cat:  This is a larger card, 6.5" X 5". Staying true to the movie theme, I knew I wanted to use my cat on the card. (So ala Kristina Werner, who always colors her stamped cats just like the one she owns, I did the same!) I had this digi-stamp from Bugaboo Stamps of the cat in various framed positions. I colored him with Distress Markers with no particular technique. I wanted to use up some old papers so decided to play off of the blue background and went with turquoise and orange. I customized my sentiment with an alphabet stamp set.

Here's my inspiration:

This is my cat, Aussie, who doesn't always "help" in my art room or craft space or anywhere I want to spread out paper. He's a big boy (15 lbs) who likes to curl up in my lap in the cold winter months when I watch late night TV.

So go over to the Red Carpet Studios Blog and link up your pet project! I'd love to visit your blog and see what you've done.
Thanks!
--Wy
"There is something about the presence of a cat...that seems to take the bite out of being alone."
--Louis J. Camuti

Sunday, October 19, 2014

Red Carpet Studios Challenge #81: The Haunted Mansion

Whoooohoooo! It's time for my favorite theme for cardmaking: HALLOWEEN!!! At Red Carpet Studios the movie is The Haunted Mansion! I'll be on my way to see the "real" Haunted Mansion in a few weeks for my vacation. (Super excited! It's my first trip to Disney World!)

So make up a spooky scrapbook page, or a card, or a tag, or anything papercraft related and share it over on the challenge blog and you might win a little something!!!

When I pulled out my Halloween stash, I was a bit overwhelmed. I had an overflowing assortment of things from years past. So I made a slew of cards made up of bits and pieces. I'll share a bunch here but you can also find other projects and ideas in previous posts and in upcoming posts, too!


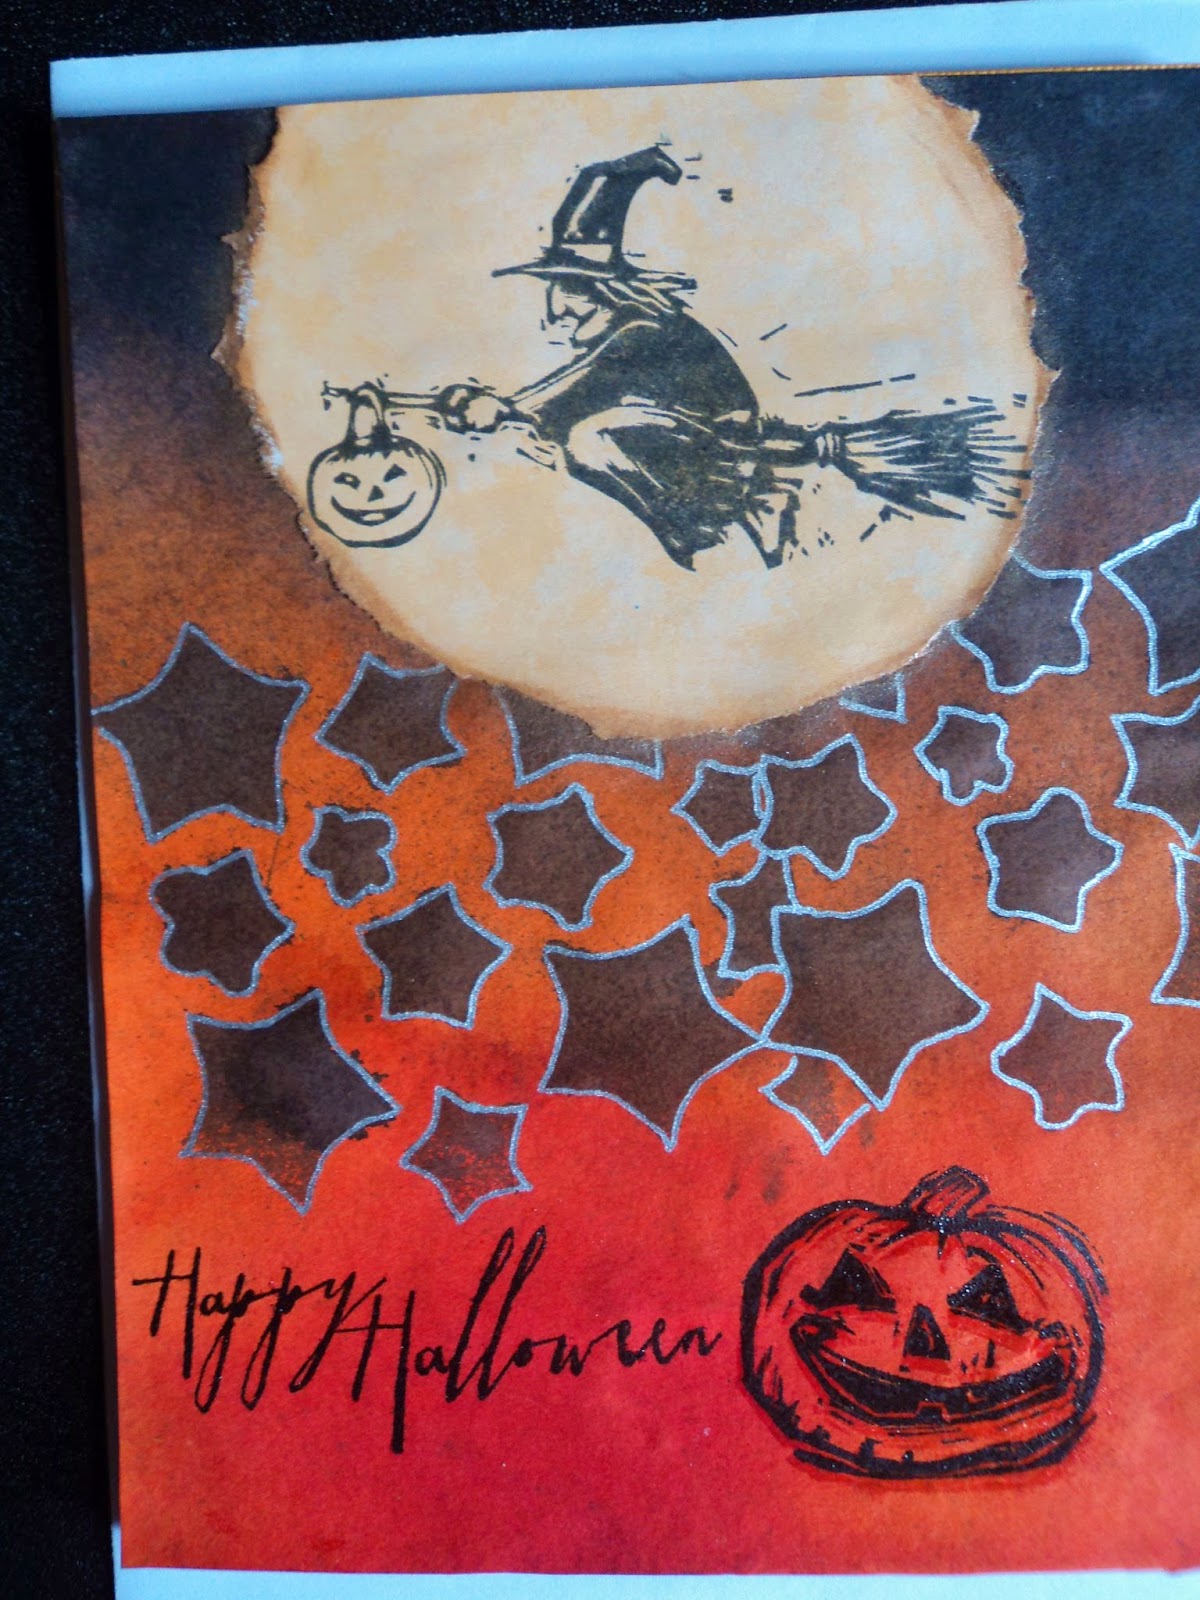
Tim Holtz Halloween: The stamps on this card are from Stamper's Anonymous and Tim Holtz. These are the new Halloween stamps that came out this year. These are the mini size. (Technically, these are my sisters stamps so THANKS, SIS!) I like the look of the wood carving these images provide as I am a fan of hand-carved stamps. This card front was actually inspired by an art journal page that I did. I was just playing around with some spray inks and testing out these new stamps. The page turned out so nice, I decided to recreate it on a card front! It's a spray ink background on watercolor paper and then it's trimmed down to stick onto the front of a 5.5 X 6 inch card. (I used Dylusions spray ink, black archival ink pad for stamping, a star stencil, a silver metallic pen, and a torn paper scrap for the moon)


Vintage Halloween:  My older brother collects old Halloween postcards. (You see the images of these postcards reproduced a lot. He collects the authentic originals and has amassed quite a collection over 40 years!) I always think of him when I use these vintage images. You can turn old photos into creepy portraits with just a few stamps or stickers. All I added to the "Ghoulfriends" was the black masks and the couple's portrait just needed a witches hat and a few bats. The sentiment reads, "Under my spell". The purple card just embraced the "trick or treating" aspect of Halloween.


Owloween:  Owls are on trend so naturally I wanted to use up some felt owls I had lying around for a year or so. The background of this card is what is really unique. I like to make "motherboards" out of scrap paper that I save from other projects. A motherboard is just a 8 1/2 X 11" sheet of sticker paper with the scraps stuck onto it. I don't make any patterns I just want to cover all the adhesive. I prefer to tear my paper and have minimal overlapping to maximize coverage. If I'm going to make cards, I then cut the mother board into four equal parts (5.5 X 4.25 rectangles or 1/4 of a sheet). The smaller sections become my background. The many "lines" of paper suggested this layout to me. I stamped the tree "branch" and filled in what the stamp didn't have. (the stamp is from Seaside Stamps and is actually a whole tree just turned on its side. But it wasn't long enough to cover the length of the card so I added more trunk on the right.) The colors suggest Halloween but it doesn't have to be. (The scrap paper used on this mother board all came from my Book of Fire Altered Book project.)


Spooktacular Scrap Card:  This card was again made from scraps of other projects. The stripes of pumpkins was a patterned cardstock scrap, the word was from stickers I had to use up and so were the bats. The stars were drawn in with a White Uniball pen on the blue card. The moon is a stamping mask I used on an ATC I was working on last week. I needed to mask off a circle on the card so I could ink it a variety of blue colors. The circle, of course, took on all these blues and so I made it my blue moon on this card. This card literally took 10 minutes but it looks great!


Scaredy Cat:  Did I spell that right? I have no idea but this little card demonstrates how an everyday stamp image can be turned into a Halloween image. This cute little digi-stamp is from Bugaboo Stamps. The cat might be playing or stalking a mouse but on a Halloween card, he might be hiding from something spooky! Again, the background was a mother board from scrap paper used in different Halloween projects. I just added the words to cement in the Halloween theme. The mother board backgrounds really are so busy that all you need to add is a focal image and a sentiment then it's finished. Nice.

Hope you found some ideas for your Halloween cards whether they're creepy, fun, whimsical, or vintage. Whatever you make, be sure to share over at Red Carpet Studios so I can see your designs and give your blog a look see!
--Wy
"The stars they turn, the candles burn
and the mouse-leaves scurry on the cold wind bourne,
and a mob of smiles shine down on thee
from the gourds hung high on the Halloween Tree."
       --Ray Bradbury, The Halloween Tree

Sunday, May 18, 2014

Red Carpet Studio Challenge #70: Saving Private Ryan

 
Wow, I can't believe it's time for another challenge at Red Carpet Studios! If you're a fan of Bugaboo Digi Stamps, listen up...it's our prize for one lucky entrant! Go over to the Red Carpet Studios Challenge Blog for all the details on how to enter your project! Then, go to Bugaboo Stamps and drool over all the great images to use on all sorts of paper crafts!


The movie playing for Challenge #70 is "Saving Private Ryan" in honor of upcoming Memorial Day and today; Armed Forces Day! So think about what your traditions are at this time of year. Do you have a picnic or BBQ? Do you attend parades? How do you celebrate FAMILY? That's what the movie is all about; bringing family home.

Using this great image from Bugaboo Digi Stamps, I created two simple cards. This image reminds me of my older brother who was in the army 30 years ago as a chaplains assistant. He was stationed in Fort Meade, Maryland and earned money to go to college. I was in high school and became obsessed with military "fashion". I loved to wear his camouflage jacket!


We Salute You Cards:  Easy to make, these cards are a matter of coloring. I wanted something simple to show off the soldier. This soldier would make good congratulations cards or even a nice Welcome Home card for returning servicemen/servicewomen. The soldier is printed onto white cardstock and colored with Distress Markers. I cut him out to attach to the card front.


The flag background is done on a 6.5 X 5" card. I used tape to mask off the white areas then added Distress Stain (Barn Door) in between. The blue star field is composed of strips of washi tape that I had in my stash. (I'm trying to use up some Washi tape as the adhesive on the back seems to be getting old and not sticking very well anymore!) A simple hand written "We Salute You" makes the sentiment in the corner. Simple but effective, I think.


Since I had the Washi tape out and several more soldiers printed, I went ahead and did this card as well. Just plain blue cardstock cut to A2 standard size for the base. The washi tape is added on the diagonal, then I added my soldier. The little "congratulations" was stamped and cut out on white cardstock then attached to the red banner. The sentiment is from a Stampin Up set; Little Banners and stamps with it's own banner outline. I thought it looked too feminine for this card so I cut it off and added my own banner.

I'm sure I'll be making more of this simple cards as I can envision a background of fireworks or stars. I can print out the soldiers in a smaller size and make my own army! Several in a line would work great for a "Great Job" card from "all of us".

Happy Armed Forces Day! Don't forget to share your cards or scrapbook pages for Memorial Day with us over at Red Carpet Studios! I'd love to see what you create!
--Wy
"The Brave die never, though they sleep in dust:
their courage nerves a thousand living men."  ---Minot J. Savage

Featured Post

The Chocolate Game

 Let's talk about something sweeter than my other blog posts of late. Let's talk chocolate. But no guarantees that anything I want t...