Showing posts with label party. Show all posts

Sunday, October 21, 2018

The Witch's Tea

Quick story before I get into this post.
This took me forever! I'm not sure if I just wasn't feeling it or what. Overall, I like my ideas and such but my execution wasn't the best. BUT, I'm sharing it anyway. I'm sure you crafty types can improve muchly upon it.

Today I'm sharing a party idea for Halloween...or anytime you wanna get the witches together. The idea of a witches tea party isn't new but here's my version.

First, the invitation:

My first attempt was WAYYYYY too complicated so I started over from scratch and came up with this. Tentacles and tea; what could be better?

Then, I made some décor:
Black candles: I found this idea on Pinterest...it's been in circulation for awhile. But I finally decided to make them. Nailed it! Sort of.

See, the painting and cardboard tubes (toilet paper rolls and paper towel rolls) were no problem. The hot glue thing worked great as well and was relatively easy. Even painting the little LEDs worked fine with regular acrylic paint; you don't need any special paint to cover them. The one thing that was a problem was the fact that my lights were smaller than most of the openings of the tubes. Which meant that you'd HAVE to glue them in for them to stay at the top of the candle. If I did that, I wouldn't be able to reach the switch that turns them on. Now that is all well and good if you don't want the candle to light up...just as a décor item in the daylight. But I didn't quite see the point of that. I mean, Halloween parties happen after dark for us adults. So I solved the problem by cutting small cardboard circles to fit inside the tube. I shoved them down inside just far enough to allow the light to sit flush with the top edge of the tube. I cut mine so they fit tightly and I didn't have to glue it in but you could, if you needed to. So those lights are removable and you can flip the switch on the bottom to light them and just set them on the top.


 Spooky eggs:  Not sure if this fits well into my party but I decided to make some spooky eggs with plastic eggs and alcohol ink.  I figured that those crafty witches would make something like this for Halloween. Maybe they'd even hide them like we do on Easter. Or maybe they'd just throw in some glow sticks for a little spooky décor. I have LOADS of these white plastic eggs and just used alcohol ink to smoosh all over them; I used black and green for mine.

You'll also see in some of the photos the other eggs I tried out. I made eyeballs out of them and propped them up on little rings I cut off the cardboard tubes. I just used Sharpies to draw the eyeball details on them. Sharpies are a great way to decorate these little eggs. I might have made more eyeballs as the eggs could be made to glow but I liked my other eyes better.

PomPom Eyeballs:  I love making pompoms but I never really have anything to do with them. Like I just collect them...they seem to just pile up like tribbles. I saw another Pinterest idea that looked easy enough and it was. Directions were easy to follow and I got EYEBALLS! I made green ones and red ones and most are only about 1.5 inches. I have pompom makers but I've seen tutorials for making your own out of cardboard. I thought these added a festive touch. I left the strings on the back so if I wanted to make a garland out of them or use them to tie around the favors, I could.


Speaking of favors/treats:


Spell casting station:  Witches would gather together and swap spells, right? So I made up a little spell casting area with loads of ingredients and what they might represent in a spell. I also made up a little spell card with 4 "beginner" spells to get guests started with mixing and matching their treats.


I placed the treats in mason jars and large black cauldrons as well as a couple of larger apothecary like jars that I had. I also made little tags to label all the ingredients with their "meaning". It makes a bit of sense when you see the spells. (I had a plan to add several wands to the equation but ran out of motivation. Did I tell you that this took forever?)
I printed out my spells on a 4.25 X 5.5 paper and just dressed it up a bit. There's two spells on each side and I printed out 4 as that filled an 8.5 X 11 sheet of paper. So the spell cards could be given to each guest as part of the favor. The little candy cauldrons are where you would mix the ingredients to the spell and then you'd pass a wand over it and recite the spell. It's too much info to add to this post but I'll put it on a separate page for anyone who would like to look at the specifics. (Feel free to use them for your own parties but please don't copy and sell them. Thanks!)

Menu ideas:
I didn't make anything in particular for this party as I wasn't actually having a party. So here's some of the menu items I was thinking would work well for this little affair. It's just a tea party so drinks and little snacks and sweets would be all that is necessary. Just enough to curb an appetite or indulge in some treats while catching up with the other witches on the block.

Witchy Brew: any variety of teas
Wicked Hot Chocolate (for the non-tea drinkers)
Finger Sand-witches
Deviled Eggs
Bony Breadsticks
Black Cat Brownies
Sugar Cookies (cut into Halloween shapes)
Ghastly Gingerbread

Most of the sweets can be made from boxed mixes and any sandwich cut up into small bite sized pieces (with the crust removed) will work here. If your peeps like coffee or apple cider, these also make good additions to the drink line-up. While I was going for a simple and quick menu, you could always add caramel or candy apples...or dunked apple slices as those fit well into the theme. 

 Don't forget to use the décor you already have to make the setting feel right. I have lots of potion bottles from the craft store, another large eyeball, and loads of old books that fit the theme. (If you can't see those book titles...from the bottom up: Superstitious, The Witch's Bridge, Night Watch, Magic and Science, A Series of Unfortunate Events, Edgar Allan Poe: Complete Collection.)


I also dressed up my background with some canvas' I made this year. You'll see "Morella" and "Wonders of a Witch" in the back. The creepy carriage picture is actually something my Mom had and if you look close enough, you can see a cupid in there. But I thought the carriage looked more creepy and along with everything else, you hardly notice.


Thanks for dropping by on my birthday! (Yup, today's the big day.)
Please come back again for more Halloween projects. New project every Tuesday, Thursday, and Sunday, with a bonus Friday and Halloween Wednesday, of course.

-Wy
"You say "wicked" like it's a bad thing."

Sunday, October 15, 2017

Party Like the Dead

So to finish off the perfect trifecta of a proper "Day of the Dead" theme, I mocked up a little party.
I ran out of time to really do it up the way I had imagined it. I'm calling it a win because I got the cake made. So this was strictly for photo opportunities.
(Just a little personal confession: I don't much go for parties. I get anxious in a room filled with strangers and I tend to sit in a corner and eat a lot. But I like the idea of parties and the decorating. Just not the people so much.)


So first off, you need an invitation.
Sugar Skull Invitations:  These invitations are all a bit different. I was experimenting with what I liked best. The invitation was made from left over banner parts. I made the banner but didn't need all the panels that I had created so I used them for the invitations.
The background is a collection of stamps from Rubber Stamp Tapestry (peg stamps). I was happy to find that these stamps look good just stamped in black with some gray. Coloring in the centers of the flowers was ok, too, but I like the way the grey-scale background allows the colors on the skull to pop.

Now, here's the set-up. You'll notice that those skulls are my main decoration.
I went with black and white with a pop of color. I got the tablecloth, plates and black flowers from the dollar store.
 Those clear glasses are a thrift store find and the tumbler I got at WalMart. (I rewarded myself after having FINALLY made an appointment for new eyeglasses!)

Now in the back are two skull canvases. One should look familiar from Thursday's post. The other one is going to be seen very soon in one of my other ongoing projects. I also pulled out a skull I had and some black bottles that my sister got me. (OMG, does she know me or what? Love bottles!)

I also made a cake for my little display. I admit that it reminds me of a cake wreck...or pinterest fail but hey, I ain't no cake decorator. Frosting isn't as easy as paint. And I was running out of time. I've been working the day job and haven't had much down time. So I had to scale this post back a bit. I was happy to get something done that the "straws" could stick in!


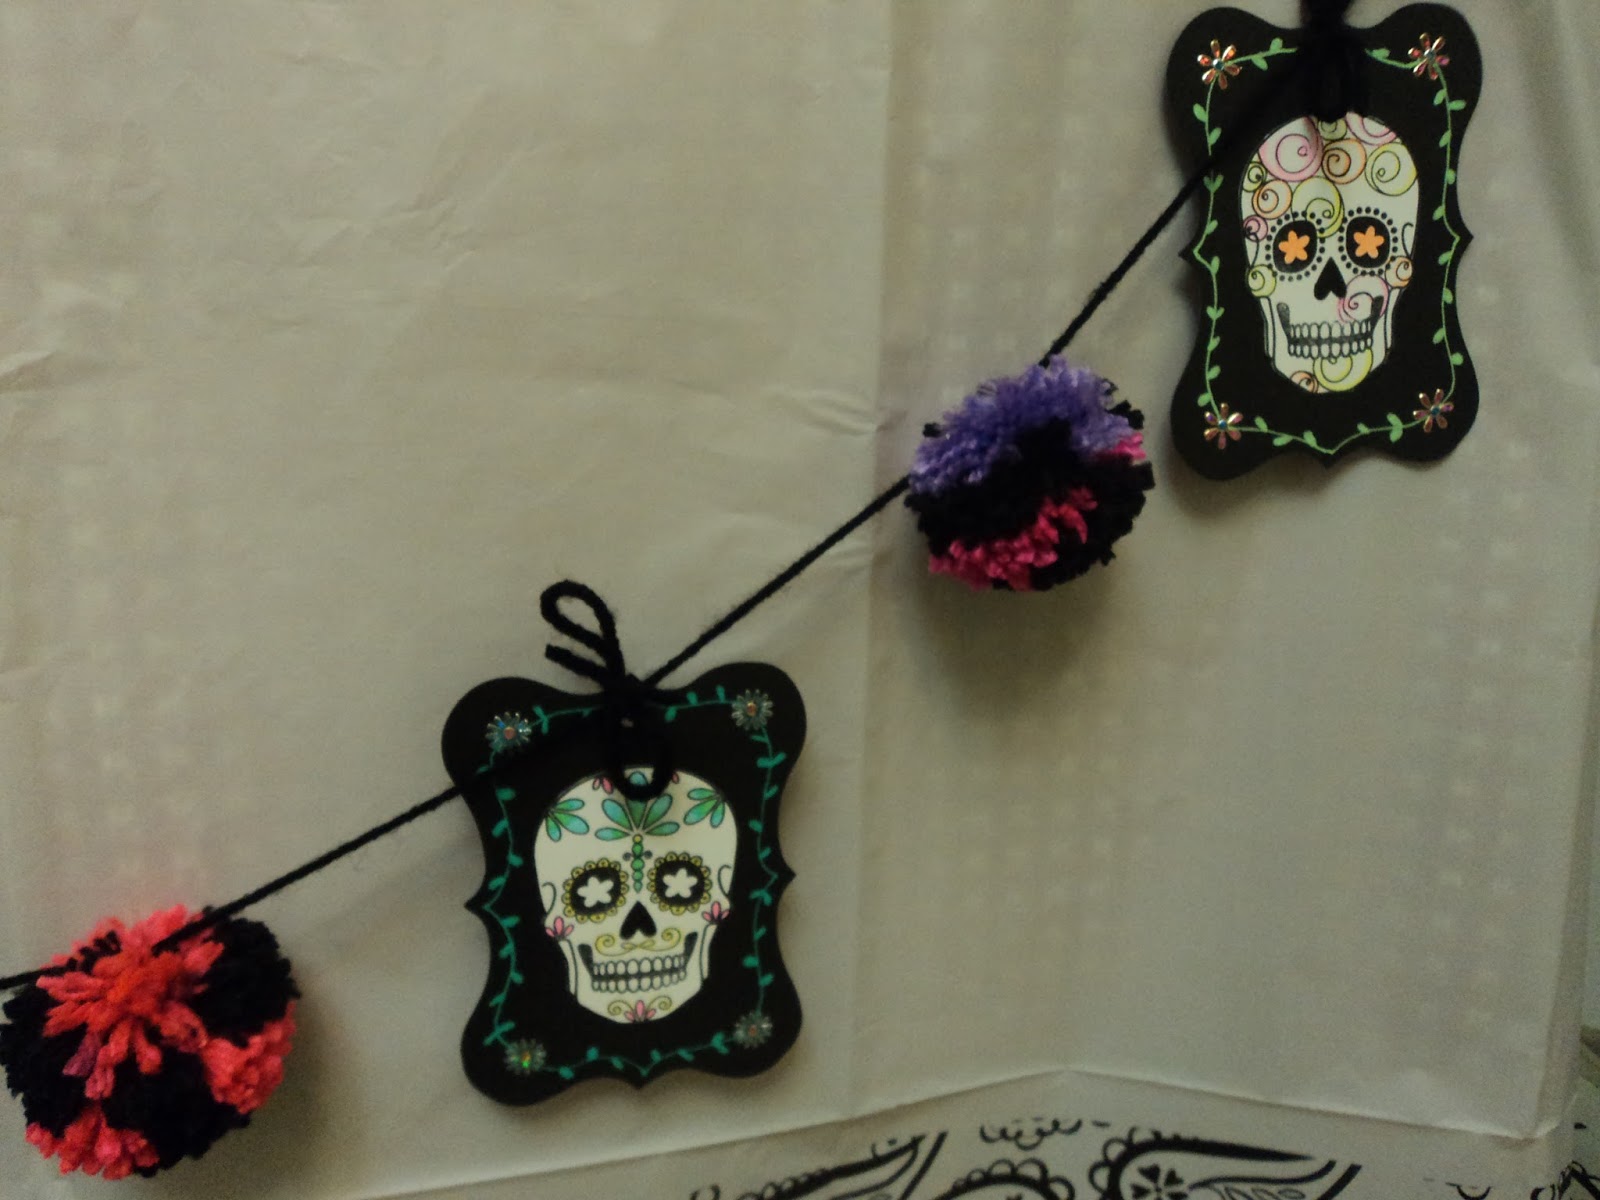
So as you can see the invitations match the straws which match the favor boxes which match the banner. Once I got going, I figured I might as well keep it consistent. I really like my pom-pom banner, too. It was a bit long for my kitchen table but I could have hiked it up some to make it more like a table skirt.
 The skulls are from a set by Simon Says Stamp. I colored them with fluorescent Zig markers. The black panels I bought like that already cut. I penned in the vine border with a Moonlight Sakura gel pen and added the little flower stickers in the corner for some bling.


I made the pom-poms from a variegated yarn that had bright colors mixed with black. It matched my theme perfectly. I just tied everything onto a strand of black yarn and called it done.

Here's a few photos of the "straws" without all the distraction.
I used them as a cake decoration but if you attach the skull further down the straw, it can be used as a straw for any creepy punch you make. As a note, these skulls could be taped back to back, too. They are symmetrical.

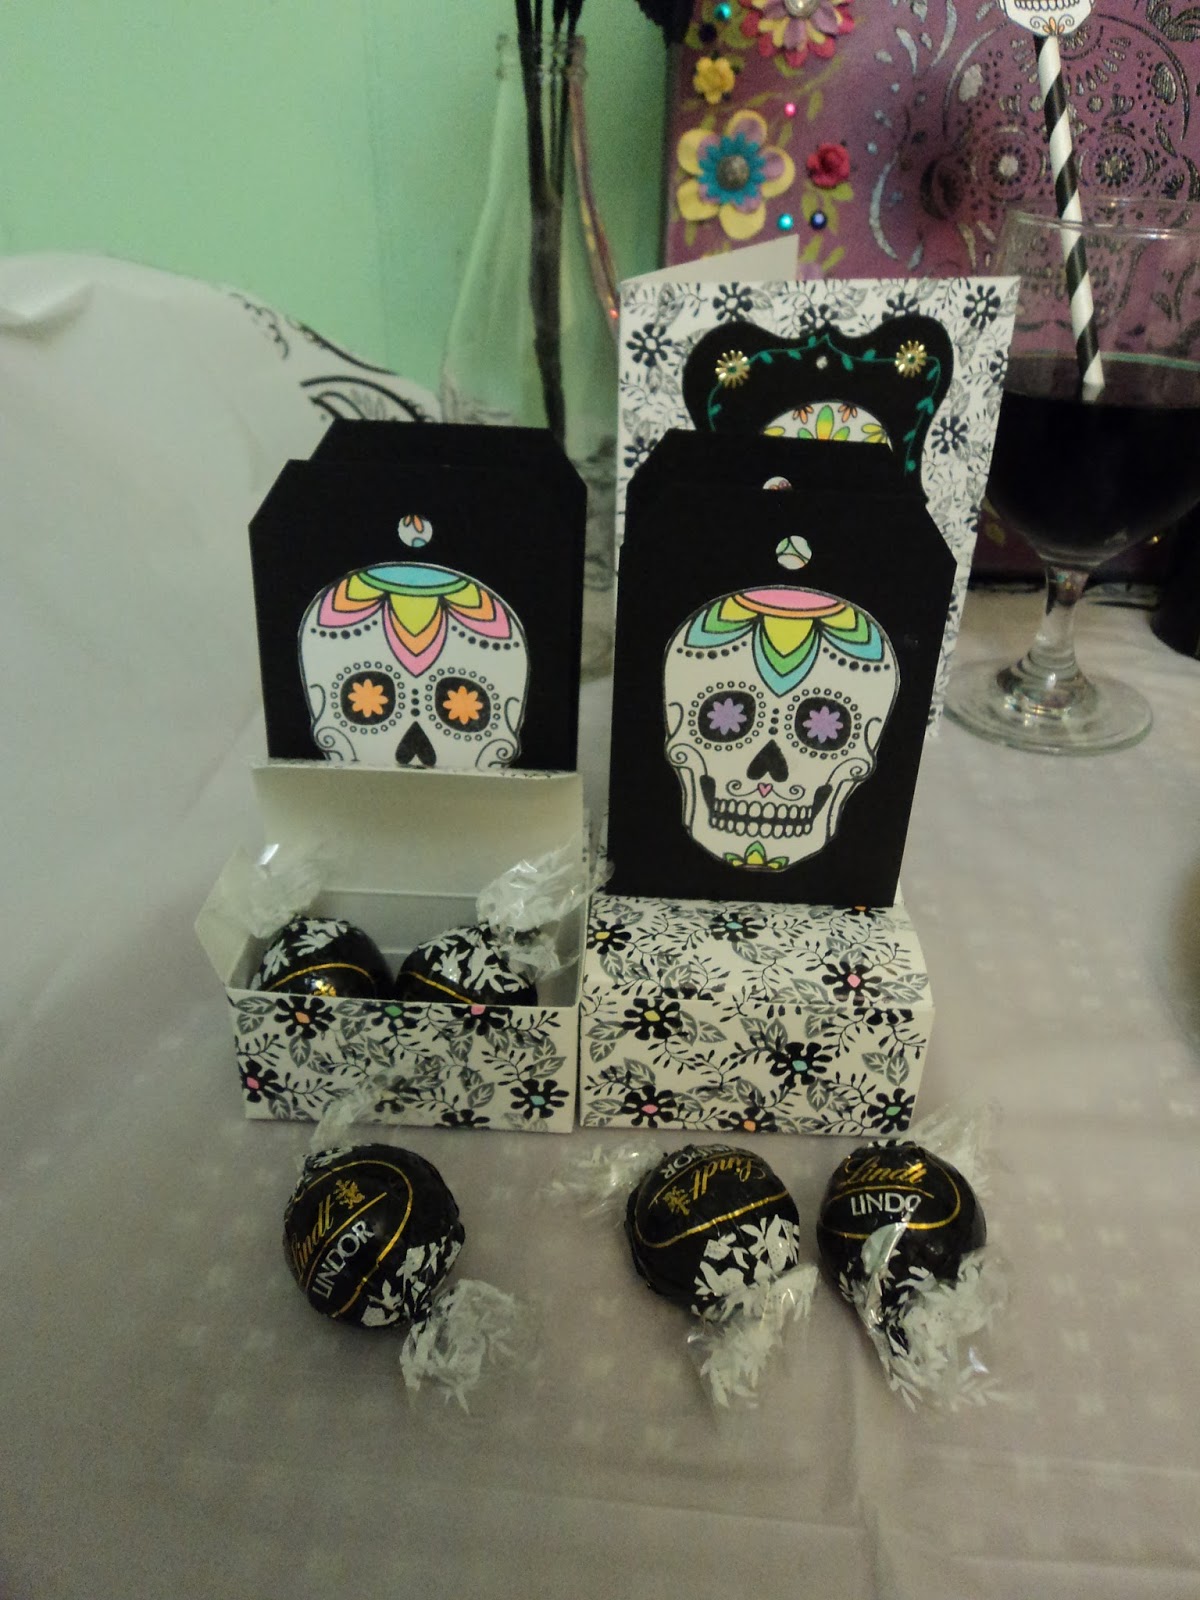
A party wouldn't be complete without a little take-home favor. So I made up some little favor boxes using that same sugar skull stamp and mimicking my invitation.


Because I wanted the back to be black, I cut my own tags to attach to the back of the treat box. The small box was just plain white but since I liked how my invitations turned out, I used that pattern to jazz them up. I added a little color to the center of the flowers for a bit more color. These treat boxes were a bit slick on the surface so even stamping in Archival ink (Ranger) took a little time to dry.


So that's my little party!

Stay tuned this week for more Halloween inspiration!
-Wy
"It was a grave yard smash!"

Featured Post

The Chocolate Game

 Let's talk about something sweeter than my other blog posts of late. Let's talk chocolate. But no guarantees that anything I want t...