 |
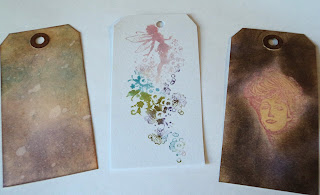
| Tags I didn't much like. I'll call them Practice Tags! :) |
 |
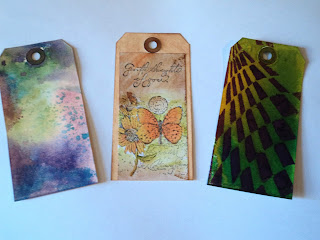
| Tags I thought turned out great! |
 |
| Two outta three ain't bad. Love the last tag in line; embossing powder over all of it! |
I was generally happy with most of them. I didn't bother to finish the tags as in, add a focal image, or embellishment, unless the technique required it. I wanted these tags to be my Standard, the example of the technique when done properly. (and believe me, I had a few not so properly completed tags) A couple tags were improvised as well but good enough to demonstrate the technique. Here's just a few of my favorites in more detail.
I was greatly pleased by this tag on the left. This stamp set (from Stampin Up) I pulled out of storage a month or so ago and it lent itself well for a watercolor experiment using Distress Reinkers. I only had three colors: Scattered Straw, Shabby Shutters, and Dried Marigold. At least they complemented each other. The darker brown is Vintage Photo and I just picked up the ink on my waterbrush directly from the pad. I like this tag so much; I plan on making a couple cards with this stamp and a couple new colors of reinkers I got this week.
 The tag at the right may have been "cheating" but I noted my changes on the back of the tag. This technique was supposed to be used with Distress Reinkers. Made into a mist, the reinkers were to be sprayed and layered then used to highligh a stencil image. I had no mini misters (and only one empty spray bottle) so I made this tag with the new Dylusions Ink Spray from Ranger. (They came practically overnight after I ordered them last weekend!) I was so excited to have them, I just wanted to play and that's where this tag came from. Both greens and a bit of Sunshine on the background, with Crushed Grape (?) for the stencil. I like.
Rather than invest in a bunch of mini misters, I'll just stick with this type of ink for now. It's not the Distress Palette, but I don't need it to be.

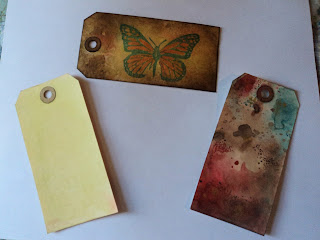
The butterfly tag above is more of an Ooopsy tag than anything. I just love the way it turned out. The background was originally just a mop up of left over inks from my Reinker Watercoloring...so orange, yellow, and green. (I have a few tags that are Mop-Ups from left over ink.) I ended up using this one for one of the Perfect Pearls techniques, that didn't quite work. I tried it first on a different tag. Inked the background with Distress, added stamp, dotted on Perfect Pearls... and here's where it went strangely wrong. The Pearls stuck to more than just the stamp image, it seemed to stick to the background as well despite my brushing. So I decided that I had to heat set the background or let it dry. (That wasn't on my tag instructions that I printed out!) So I flipped the tag over and tried it all again but heat set the background. I dotted on the Perfect Pearls but then, I apparently got a bit too rough and most of it came off the image as well as the background. (No, I didn't heat set the stamp image!) I decided that the image itself probably didn't lend itself well to the technique. I needed to select an image that had more surface area, was a bit bolder and not so fine of detail. So here sat this tag, completely and utterly dry as I had made it several days before, and my hand-carved Monarch Butterfly stamp. I stamped the butterfly in Broken China and sprinkled on my Perfect Pearls, Kiwi. The Pearls stuck beautifully to the stamp and not so much to the background. My other oopsy was when trying to mist it to get the ink to wick from beneath the Pearls, I apparently didn't wait long enough or didn't have enough mist, because as you can see the dark part of the butterfly didn't wick very well, if at all. So I still need some practice with this technique! (But I like the tag just the same. I went in and added some color to the wings afterward.)
 I thought Perfect Pearls would be the product I could MOST do without. However, the techniques I learned for it were very rewarding. I was super surprised to find out that they were also quite simple and easy. Though I had trouble with applying the powder directly, and I simply didn't like doing it so much, it did look very nice and the shimmer stayed where I put it. But Perfect Pearls and I got along much better when I was applying it as a mist (mixed with a reinker) or in the Wrinkle Free Distress technique. I admit to loving this technique and adding the Perfect Pearls into it, just added a new dimension. So the tag at the left is my result. I used some vintage patriot colors, Broken China, Fired Brick, and Walnut Stain with just a touch of Vintage Photo. The Perfect Pearls was Kiwi (again, the only one I own at present). I just loved the way this turned out! It really looks layered this time. The colors seem very balanced with the brown and though you can't see the small shimmery parts, they are there, in small blobs and thin water-like lines. I'm definately trying this combo again for some Independence Day cards!
So overall, I had great fun with the class and loved all the videos! I appreciated the pdf downloads of materials. I didn't bother to print out most of the materials, just the small instructions for the back of my tags. Since I can always go back to the material, I didn't figure I'd need the hardcopy.
I'll definately be watching for more of these classes in the future from www.onlinecardclasses.com


No comments:
Post a Comment