Pocket Letters: The 1st Four
Ok, so I'm making pocket letters. Sort of. Haven't heard of them? Check YouTube or go HERE to learn more.
I'm not really doing any swaps, just making them for family. I might work my way up to some swaps. Who knows? I love ATC size or playing card size but pocket letters also seem to involve little "gifts" that I'm not so much interested in. It's also an offshoot of pen pal-ing which I never had an interest in.
So I decided to do a pocket letter for each month of the year for my niece. I've got the first 4 months done and she might even get them before Easter. LOL! I don't put too many "gifts" in the pockets...mostly just stamp images that are fussy cut or colored and maybe some stickers.
I have discovered that it's a great way to use up little scraps or to make a small stamp image be a cool focal element. I also like how you can stick to making each card different or linking some of them together to be a larger image. It has it's own challenges. Like do you cover the back of the card or not? I do mostly, unless it's practically spotless on the reverse side. But I like the consistent look of the reverse side when it's all covered with a similar color or paper.
So here we go:

January: Mostly this was inspired by the background paper. It's a mop-up page from my Art journal. It just looked cool and wintry. I was going to make cards with it but it cut up into 7 cards. I used a leftover bit for another card and just a plain white cardstock for the last. I wanted some consistency throughout the months so I knew one card would be the name of the month and the year and there would be a card or two for any major holidays. I, then, established a little personal touch by adding a card with "3Things I like to do in January". The rest of the cards just match the winter theme, and color. (I added some gifts to the back of the pocket like a cut-out of the yeti and penguin stamp image. I also had some acrylic snowflakes and some build-your-own snowman stickers. Lastly, I added some small blue beads in a little ziploc bag.)
 Winter Fun Penguin: I got this small stamp set from Hot off the Press as a mistake. (Instead of shipping me my order a while back, I got some stamping kit of the month. They were kind enough to let me keep it. This little set was cute but I wasn't a fan of the bigger set. It'll probably go out to a second hand store.) I used the background to guide my stamping so that the words seem framed by the swirls.

New Year: These stamps are also from a set from Hot off the Press; a new steampunk set. I had been making a card for a friend and had them out. The sentiment seemed worthy of a New Year's occasion. I added some green Distress ink around the edges of this one to bring out some of the green splatters in the background of some of the cards.
 February: With Valentine's Day in this month, I knew I had to have some pink. It's my niece's favorite color. But I added the purple because it looks neat and amethyst is the birthstone this month. I might have overdone it with the purple but I screwed up a pink card and couldn't save it. The pink paper was only a scrap and I didn't have any more of it. (The gifts in the back of this pocket letter were just some cut-outs of the stamped images. I added a skunk and a few of the owls with added google eyes! I also threw in some heart stickers.)
 Sweetheart Owls: This stamp is one of those from Studio G that you find in the dollar bins at Michael's. I love to cut out the owls separately and back them with patterned paper. I added some Liquid Pearls (Platinum) to the heart in the girl owls wings. These owls also look super cute with googly eyes!
 Quote: I thought it would be fun to add a quote. This one is from Helen Keller. (Unfortunately, I just didn't add any more to the next months...too many other ideas!) It wouldn't fit horizontally so I went with a vertical layout. Those roses are from a hand-carved stamp I made and they are about the size of a penny.
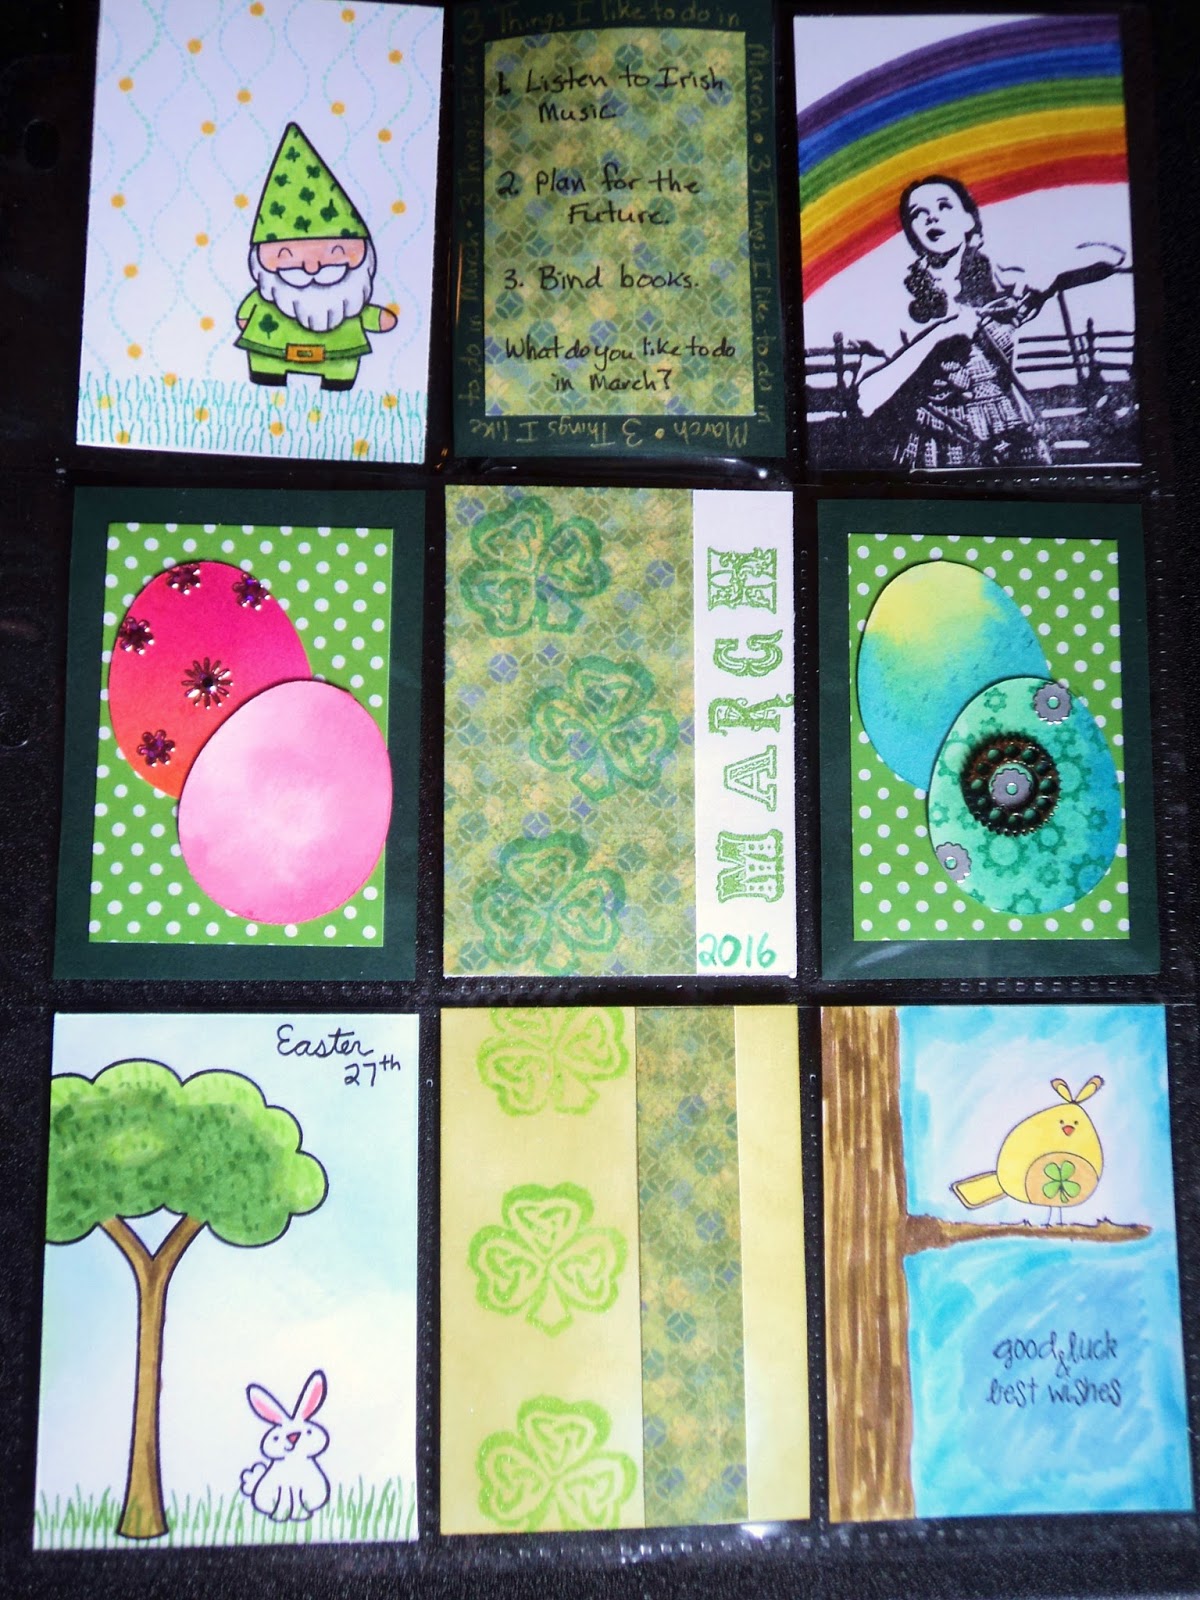
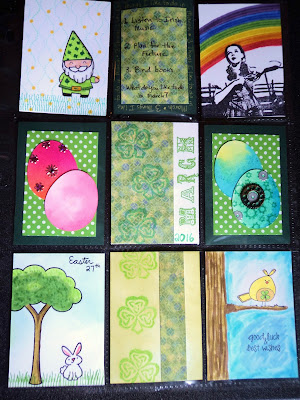 March: I wanted each month to be specific to 2016 which means that March contains both St. Patrick's Day and Easter. This made the composition a little more complex. I decided to go mostly with St. Patrick's Day with just some touches of Easter. (For little gifts in the back pockets, I added some Easter eggs like you see on the cards in the middle, some shamrocks, a few rainbow stickers, and a small journal that I bound from scrap papers.)
 Leprechaun: I admit that I may be addicted to Lawn Fawn stamps! I bought the set Gnome Sweet Gnome a while ago when they had a big sale but I hadn't used it yet. I thought the Gnome could be used for several different things besides a garden gnome. (Like this leprechaun or a Santa.) So I used the grass in the set to set a lawn and used the wavy dotted line to make it appear like coins were raining down.
 Over the Rainbow: I figured what went better with St. Patrick's Day than a rainbow? So I found this old stamp that had been hand-carved by JackBear Stamps. I added the rainbow behind Dorothy with Distress Markers. I decided that this card didn't need much because that stamp is so cool.
 Easter Bunny: More Lawn Fawn stamps! This is from Critters in the Burbs set. I went with a clean and simple approach and I like it that way.
 April: Without Easter to contend with, April was looking pretty empty for "occasions". While April Fool's Day was an idea, it didn't seem to fit with where I wanted to take this page. I focused on April Showers and Earth Day. So ended up with lots of birds in yellows and blues. (For little gifts, I just added a lot of homemade stickers made from the chick stamp and the kite stamp. I left them white so my niece can color them.)
 Rainy Day Owl: This is a stamp from Unity Stamps. I came in this set and I adore it! I colored him in after I had all the other cards finished so I could make sure he matched my color scheme. He's colored in with Distress Markers.
 Marching Chicks: You can see I used my new Feathers stamp set here from Hot off the Press. The cute chicks are from Unity Stamps. I colored them and cut them out some time ago and just pulled them out of my stash. I like to stamp many images at once and color them up or just have them cut out and ready to go. I wanted the two cards to mash together to make a nice block at the bottom of the page.
That's what I've got done for the year for now. I'll be starting the next 4 months soon! Stay tuned.
-Wy
I'm not really doing any swaps, just making them for family. I might work my way up to some swaps. Who knows? I love ATC size or playing card size but pocket letters also seem to involve little "gifts" that I'm not so much interested in. It's also an offshoot of pen pal-ing which I never had an interest in.
So I decided to do a pocket letter for each month of the year for my niece. I've got the first 4 months done and she might even get them before Easter. LOL! I don't put too many "gifts" in the pockets...mostly just stamp images that are fussy cut or colored and maybe some stickers.
I have discovered that it's a great way to use up little scraps or to make a small stamp image be a cool focal element. I also like how you can stick to making each card different or linking some of them together to be a larger image. It has it's own challenges. Like do you cover the back of the card or not? I do mostly, unless it's practically spotless on the reverse side. But I like the consistent look of the reverse side when it's all covered with a similar color or paper.
So here we go:

January: Mostly this was inspired by the background paper. It's a mop-up page from my Art journal. It just looked cool and wintry. I was going to make cards with it but it cut up into 7 cards. I used a leftover bit for another card and just a plain white cardstock for the last. I wanted some consistency throughout the months so I knew one card would be the name of the month and the year and there would be a card or two for any major holidays. I, then, established a little personal touch by adding a card with "3Things I like to do in January". The rest of the cards just match the winter theme, and color. (I added some gifts to the back of the pocket like a cut-out of the yeti and penguin stamp image. I also had some acrylic snowflakes and some build-your-own snowman stickers. Lastly, I added some small blue beads in a little ziploc bag.)


New Year: These stamps are also from a set from Hot off the Press; a new steampunk set. I had been making a card for a friend and had them out. The sentiment seemed worthy of a New Year's occasion. I added some green Distress ink around the edges of this one to bring out some of the green splatters in the background of some of the cards.


That's what I've got done for the year for now. I'll be starting the next 4 months soon! Stay tuned.
-Wy

Comments
Post a Comment