The Firefly Card
Seems like forever since I had a project to share! Every day I've had available to craft, I've felt...not-so-good. But finally on Sunday, I got something done! And bonus!...it lights up! I'm linking this project up to the Lawnscaping Challenge, too!)
Chibitronics makes it possible. I am having a fun time with my Starter Kit and a few extras. Check out their site for great ideas and see what's possible. I highly recommend the Starter Kit! It has all you need to get started and to make this card. (Except the strong magnet. Those magnets can be found HERE.)
I highly recommend reading the Sketchbook from the Starter Pack for more detailed info about how circuits work and can be designed. It's far too much to include here. But the directions in the Sketchbook are easy to understand and take you step by step through making your own circuits.
Here's my finished project:
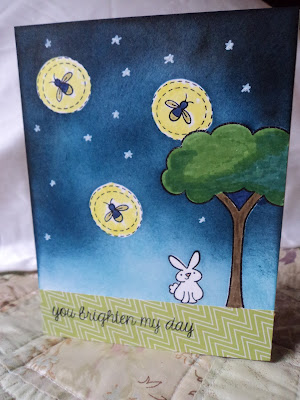
I used Lawn Fawn stamps from the Critters in the Burbs set and from Summertime Charm set.
Light up cards aren't hard to make so long as you plan it out first. The stamped portion of my card is a separate panel that I attached to the card base so I could hide the circuitry.
In a nutshell, you need only a few things to make a light-up card: a power source (battery), a conductor (copper tape), lights (LED stickers). In essence, you connect the positive from the battery to the positive on the light via copper tape. Same with the negative. Don't cross them...you'll get a short circuit. That's the basics.
Here's the process:
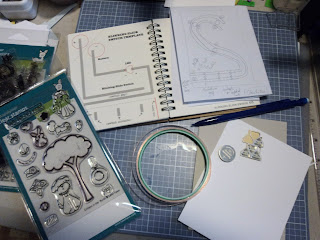 1. I gathered up my materials. I basically pulled out my Chibitronic Starter Kit, some stamps, a card base and extra panel, a pencil, and adhesive. My idea was to stamp a night scene with fireflies that would light up. I sketched out a little scene on scrap paper so I had an idea of how the finished card would look.
 2. Sketch out a "skeleton". I call the internal circuitry, the skeleton, of the card. I didn't want all my copper tape to show and I wanted the small LED lights to shine through the paper/cardstock. The photo above shows my first attempt at sketching out the skeleton. It wasn't going to work. The left side shows a page from the Sketchbook that comes in the Starter Kit...it was what I wanted. A Blinking Slide Switch. So when you run your finger along the bottom of the card; the LED sticker lights would blink on then off then on...
(The card doesn't end up this way because I goofed it up. I'll explain some at the end of this tutorial.) The above sketch wasn't going to work so I tried another sketch as seen below.

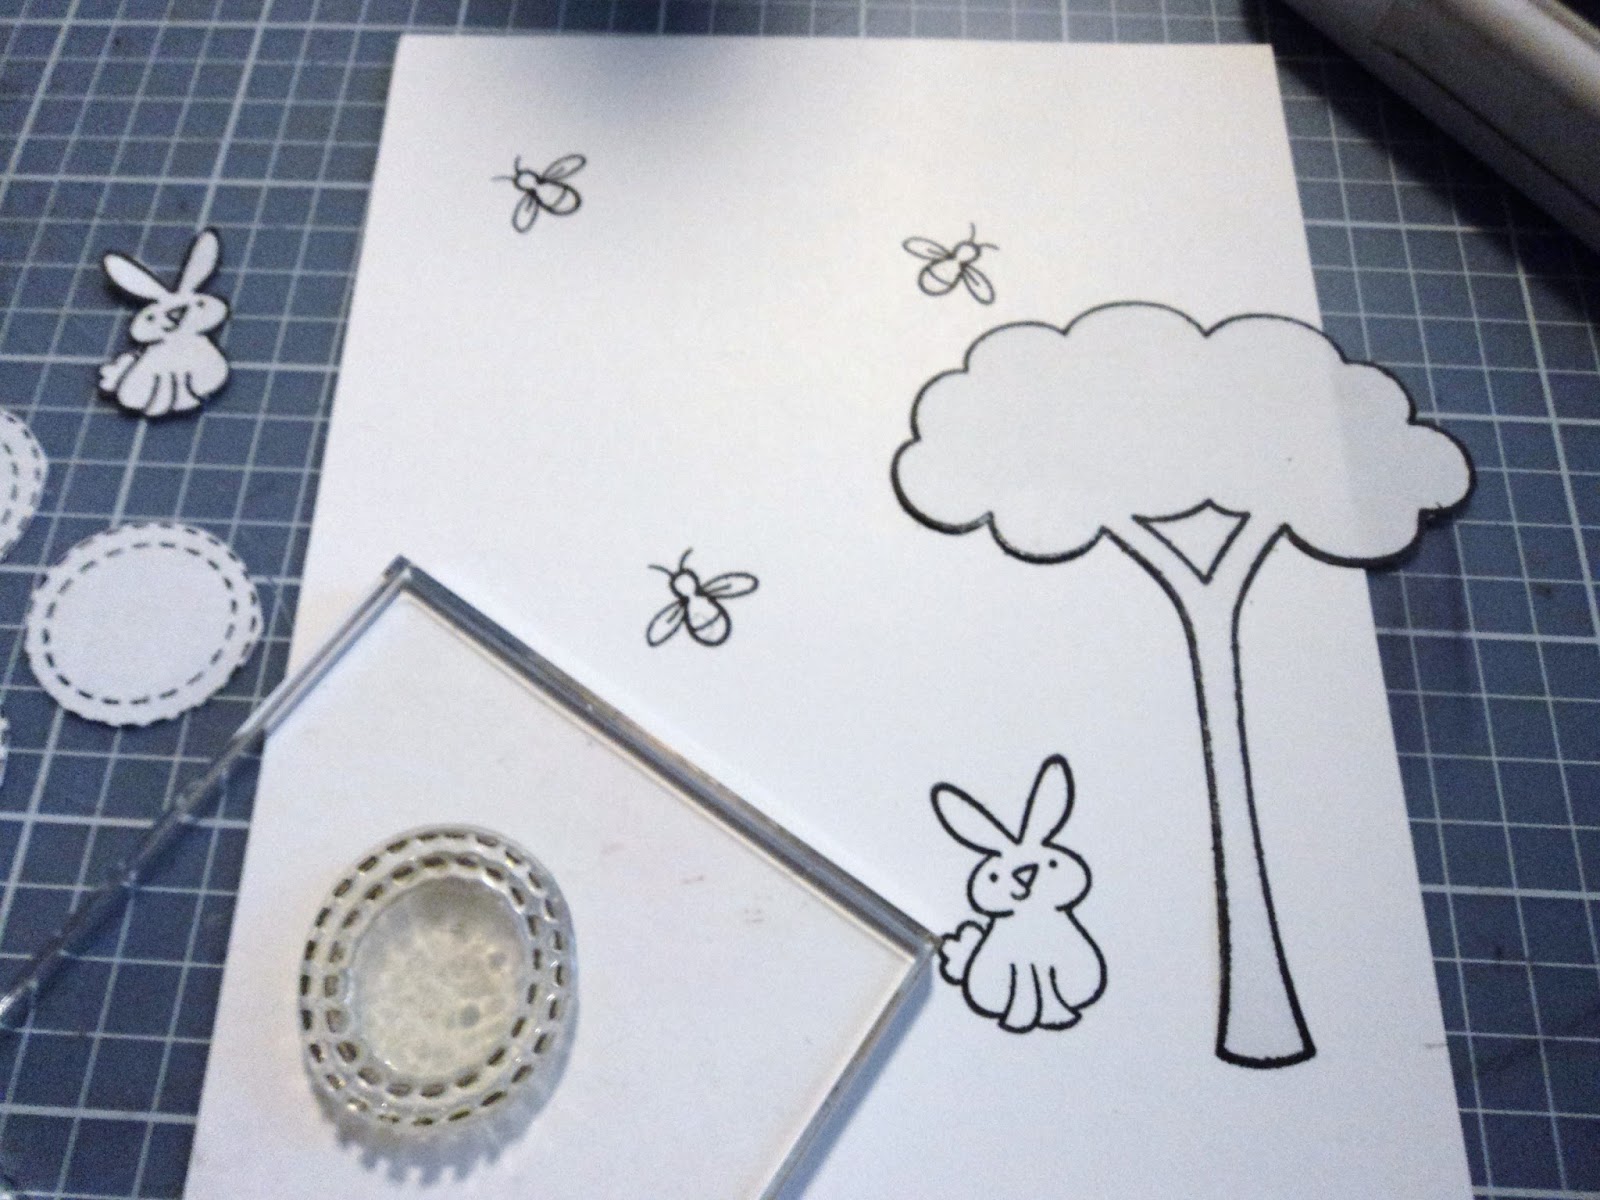
3. Plan out your lights. I stamped out where I wanted the fireflies to be (those round circles) and penciled in lines to connect them. I need a continuous line for the negative. I need two lines for the positive because that is where I'll place my switches. The negative line will run from the battery through the lights then end on the front. One positive line will connect all the lights and then form a line along the bottom of the card. The other positive line will run along the bottom of the card and connect to the battery. (The actual switches will be added later. They go on the back of the front panel.) The lines are going to be my guide for laying down the copper tape. They trail off the edge of the card front because the battery is going on the inside of the card. So the tape has to wrap around to the other side.

 4. Lay down the copper tape. Following the lines of the skeleton, I laid down the copper tape. (Refer to your Sketchbook for tips and tricks on how to lay it down.) I just followed the lines making sure to keep it continuous. I used the outline of the LED stickers to approximate how much space to leave between the positive and the negative lines. The LEDs need both lines to touch so make sure not to leave too much of a gap. You also don't want the positive tape to touch the negative tape or you'll have a short circuit.

5. Connect the tape to the battery. The copper tape has to wrap around the edge of the card in order to connect to the battery. Just wrap it around to the inside of the card and end them. I like to trace around the battery so I know where it's going to be placed. The battery is placed along the fold of this card so the tape hits both the positive and the negative when the card is shut. THAT will power the lights.
 6. Test the circuit. I always test the circuit when I've got it done. So I add the LED stickers to my preselected locations making sure the positive end is touching the positive tape and the same with the negative. Once my LEDs are secure, I add the battery to the inside of the card and close it. Because I have a SWITCH in my design, the lights will only get power when the gap is bridged by copper tape. So to test, I laid a small piece of tape along the gap where I can press.
 I placed the blank panel over the top of the card and pressed. The LEDs lit up! Circuit is good to go.
With the skeleton complete, I can now work on the front panel of my card.
 7. Position the fireflies. While the test lights were on, I made a little circle with my pencil as to where they showed up on the front panel. That's where I want to stamp my fireflies so that they are aligned with the LEDs underneath the panel. Once I had those stamped, I just positioned the rest of the stamps around them. I cut masks for all the stamps; the tree, the bunny, and the circles. I was going to ink the background and I wanted these places to remain white so I could color them in.
 8. Ink background. With the masks in place, I began to ink the background to make my night sky. I started with Distress Broken China, then added Midnight Muse (Stampin Up!) (Distress Chipped Sapphire would also work here!), and finally blended a little Distress Black Soot just along the upper edges. I used a sponge to apply all the inks directly to the front panel.

9. Remove masks and color. Once my background was the way I liked, I pulled off all the masks being careful not to get my inky fingers onto the white areas. Then I colored in the images with Distress markers. I added a strip of green patterned paper to the bottom to give a horizon line and to house my sentiment.

 10. Attach panel to card. It was time to add the switches. Switches are just little pieces of copper tape added to the back of the FRONT PANEL. So when the front panel is attached to the front of the card, the tape can be pressed into the gap to complete the circuit. Once my scene was complete, I added double stick tape along the edges of the back of the front panel and lined it up with the card front. Once I added my battery to the inside, and pressed along the sentiment, the fireflies all lit up!

So here's my Ooopsy: remember when I set up my circuit it was supposed to make the fireflies blink? Well, that didn't happen. I believe I placed the switches too close so that when I pressed the first, it also connected the second so the fireflies never blinked off as I ran my finger along the edge of the card. But hey, it's a learning process and I like the card as it is. They light up fine!

 11. Attaching the battery. The battery just has to make contact with the copper tape. When the card is shut, just holding that corner will make that connection. I added the small magnet to the back of the card to hold the battery in it's proper spot. That magnet holds the battery to the inside of the card so that it doesn't fall out. I then taped the magnet to the back of the card so it wouldn't shift in an envelope.
Lastly, I just added a few stars to the sky with a white gel pen.

Whew! Finished!
This card is a real show stopper. Although I goofed up my blinking switch, I still love the card and it lights up so wonderfully. Photos can't do it justice. These little LED lights add a Wowza to an otherwise simple little card.
If you want to recreate this card, you can find all the things you need for any light-up project at Chibitronics. The Starter Kit is well worth it and you get enough supplies for several projects!
I'm planning out my next light up adventure already...perhaps a paper lantern or maybe a banner? Hmmm...
Thanks for dropping in.
--Wy
Lawnscaping Challenge #108: Stars and Stripes

Chibitronics makes it possible. I am having a fun time with my Starter Kit and a few extras. Check out their site for great ideas and see what's possible. I highly recommend the Starter Kit! It has all you need to get started and to make this card. (Except the strong magnet. Those magnets can be found HERE.)
I highly recommend reading the Sketchbook from the Starter Pack for more detailed info about how circuits work and can be designed. It's far too much to include here. But the directions in the Sketchbook are easy to understand and take you step by step through making your own circuits.
Here's my finished project:

I used Lawn Fawn stamps from the Critters in the Burbs set and from Summertime Charm set.
Light up cards aren't hard to make so long as you plan it out first. The stamped portion of my card is a separate panel that I attached to the card base so I could hide the circuitry.
In a nutshell, you need only a few things to make a light-up card: a power source (battery), a conductor (copper tape), lights (LED stickers). In essence, you connect the positive from the battery to the positive on the light via copper tape. Same with the negative. Don't cross them...you'll get a short circuit. That's the basics.
Here's the process:

(The card doesn't end up this way because I goofed it up. I'll explain some at the end of this tutorial.) The above sketch wasn't going to work so I tried another sketch as seen below.

3. Plan out your lights. I stamped out where I wanted the fireflies to be (those round circles) and penciled in lines to connect them. I need a continuous line for the negative. I need two lines for the positive because that is where I'll place my switches. The negative line will run from the battery through the lights then end on the front. One positive line will connect all the lights and then form a line along the bottom of the card. The other positive line will run along the bottom of the card and connect to the battery. (The actual switches will be added later. They go on the back of the front panel.) The lines are going to be my guide for laying down the copper tape. They trail off the edge of the card front because the battery is going on the inside of the card. So the tape has to wrap around to the other side.


5. Connect the tape to the battery. The copper tape has to wrap around the edge of the card in order to connect to the battery. Just wrap it around to the inside of the card and end them. I like to trace around the battery so I know where it's going to be placed. The battery is placed along the fold of this card so the tape hits both the positive and the negative when the card is shut. THAT will power the lights.


With the skeleton complete, I can now work on the front panel of my card.


9. Remove masks and color. Once my background was the way I liked, I pulled off all the masks being careful not to get my inky fingers onto the white areas. Then I colored in the images with Distress markers. I added a strip of green patterned paper to the bottom to give a horizon line and to house my sentiment.


So here's my Ooopsy: remember when I set up my circuit it was supposed to make the fireflies blink? Well, that didn't happen. I believe I placed the switches too close so that when I pressed the first, it also connected the second so the fireflies never blinked off as I ran my finger along the edge of the card. But hey, it's a learning process and I like the card as it is. They light up fine!


Lastly, I just added a few stars to the sky with a white gel pen.

Whew! Finished!
This card is a real show stopper. Although I goofed up my blinking switch, I still love the card and it lights up so wonderfully. Photos can't do it justice. These little LED lights add a Wowza to an otherwise simple little card.
If you want to recreate this card, you can find all the things you need for any light-up project at Chibitronics. The Starter Kit is well worth it and you get enough supplies for several projects!
I'm planning out my next light up adventure already...perhaps a paper lantern or maybe a banner? Hmmm...
Thanks for dropping in.
--Wy
Lawnscaping Challenge #108: Stars and Stripes

WHOA! This is amazing! I love the tutorial, and the card is just incredible! Thanks for playing the Lawnscaping Challenge!
ReplyDelete-Samantha
Wow! You bring the creating-instruction for an idea I had a few monthes ago: illuminated fireflies.
ReplyDeleteBut I had NO idea, how to realize this idea... Now I have a base to start off. (But I'm not sure when I have everything here to start this project...)
Thanks so much for your detailed instruction! The card is amazing!
Greetings, Wiebke
P.S. Funny to read you're from Potsdam. I know there are several towns with the same names in USA and Germany, but I havn't known about this one.
I life in Germany - between Berlin & Potsdam.
WOW! Here lot of creative things :)
ReplyDelete